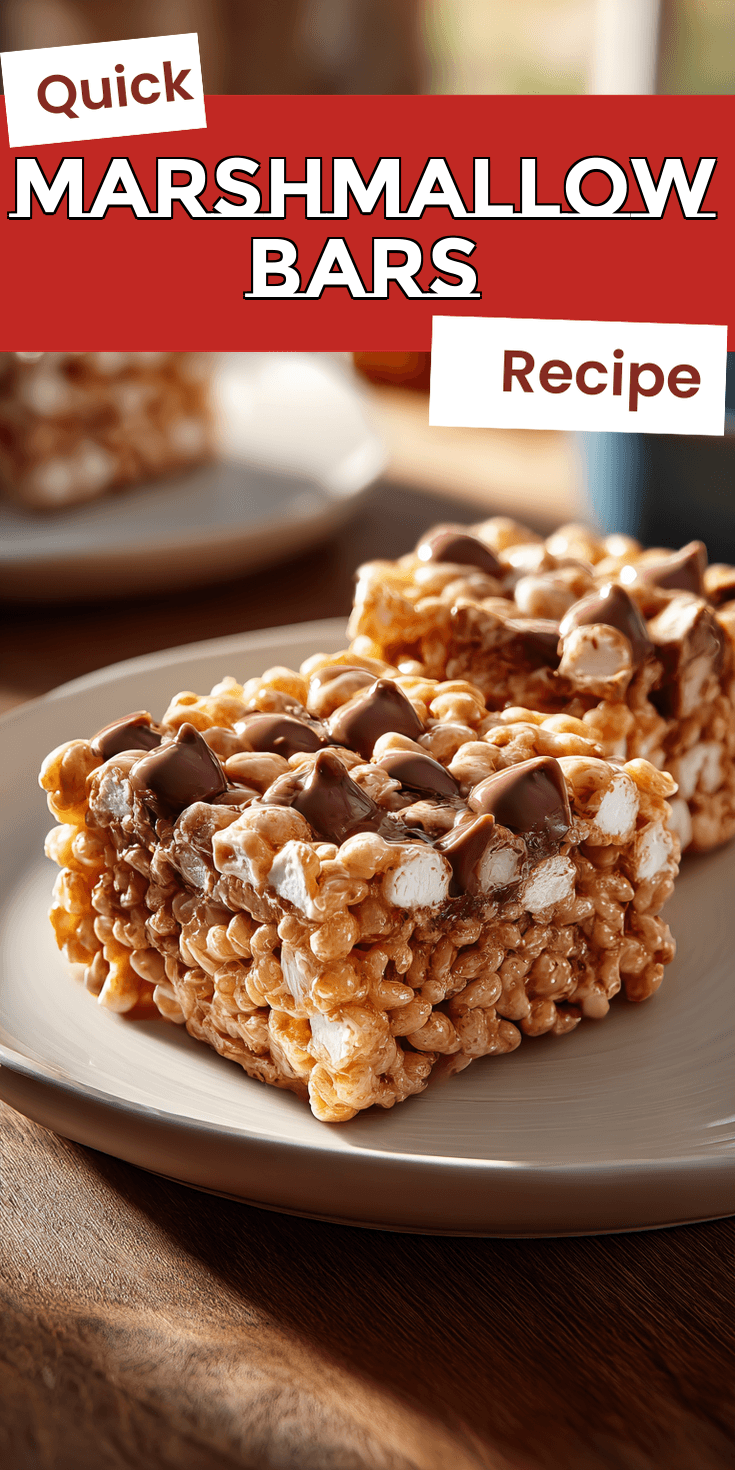
Want a dessert that feels like a party but costs less than a fancy coffee? This Marshmallow Bars recipe is my go-to secret. It proves you don’t need expensive ingredients to eat well, or in this case, to treat yourself incredibly. If you love easy bar desserts, you should also try my gooey marshmallow brownies for another simple, crowd-pleasing treat.
These bars are the ultimate easy dessert. They come together with pantry staples and a single bowl. In under an hour, you have a pan of gooey, crispy, sweet magic that feels anything but budget-conscious.
I make these all the time for potlucks, last-minute guests, or just a sweet pick-me-up. They are the definition of a quick dessert that delivers maximum joy for minimal effort and cash. Let’s get into how you can make them.
Recipe Overview
Here’s the quick snapshot of what you’re making. It’s as simple as it gets.
Marshmallow Bars Recipe
The Budget-Friendly Ingredient List
How to Make It (Step-by-Step)
Notes
Enjoy your homemade Marshmallow Bars Recipe!
- Cuisine: American
- Category: Dessert, Bar Cookie
- Prep Time: 10 minutes
- Cook Time: 25 minutes
- Total Time: 35 minutes (plus cooling)
- Servings: 16 generous bars
Why This Recipe Saves You Money
I love recipes where the cost breakdown is genuinely satisfying. This one is a champion.
First, the base is just cereal, butter, and marshmallows. These are pantry heroes with long shelf lives, so you can buy them on sale and keep them stocked. A bag of marshmallows costs pennies per bar.
Second, there’s no need for special equipment. One big pot and a spatula are all you need. You save on energy costs, too, since the stovetop work is done in minutes. Finally, it’s incredibly forgiving. A generic brand of cereal or store-brand butter works perfectly here.
My Tips for Smart Shopping on a Budget
Building a budget-friendly pantry is a skill. These tips help you save every time you shop.
Always buy marshmallows in the largest bag you’ll reasonably use. The cost per ounce drops dramatically. Check the baking aisle for store-brand “crispy rice” cereal—it’s identical to the name brand.
Butter can be pricey. I watch for sales around holidays and freeze a few boxes. For this recipe, salted or unsalted works, so grab whatever is on the best deal. Don’t buy mini chocolate chips; just chop a bar of baking chocolate you got on sale.
The Budget-Friendly Ingredient List
Here’s your simple shopping list. Measure with your heart, but your wallet will thank you.
- 1/4 cup (1/2 stick) butter
- 1 (10 oz) bag standard marshmallows
- 1 teaspoon vanilla extract
- 6 cups crispy rice cereal
- 1/2 cup semi-sweet chocolate chips or chopped chocolate
- Optional: A pinch of flaky sea salt for topping
How to Make It (Step-by-Step)
Follow these steps for perfect, no-fuss bars every single time. It’s almost impossible to mess up.
- Start by greasing a 9×13 inch baking pan lightly with butter or cooking spray. Set it aside.
- Measure out your cereal into a very large mixing bowl. Having it ready is key for the next step.
- In a large pot, melt the butter over low heat. Add the entire bag of marshmallows and stir constantly until they are completely melted and smooth. This takes about 5-7 minutes.
- Remove the pot from the heat. Quickly stir in the vanilla extract.
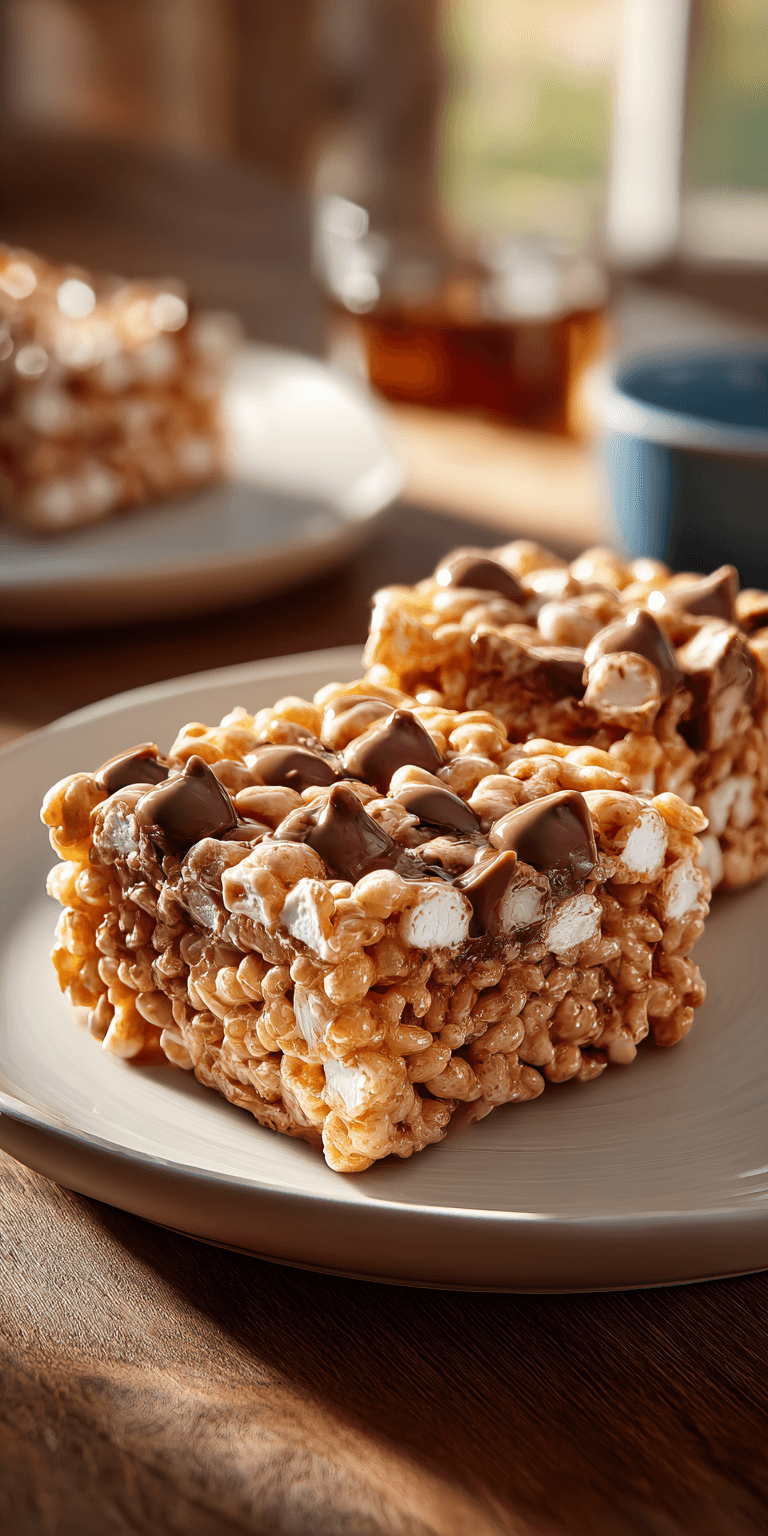
- Immediately pour the hot marshmallow mixture over the cereal in your big bowl. Use a greased spatula to fold and stir until every piece of cereal is evenly coated.
- Press the mixture firmly and evenly into your prepared pan. I use a piece of parchment paper to press it down—it prevents sticking.
- Sprinkle the chocolate chips over the hot bars. Let them sit for a minute to soften, then use a knife to swirl them gently. Add a pinch of flaky salt now if you’re using it.
- Let the pan cool completely at room temperature before cutting into squares. This patience is the hardest part!
How to Use Up Every Last Bit (No Waste!)
I hate throwing food away. Here’s how to make sure every ingredient in this recipe gets used.
That half-stick of butter left? Wrap it well and freeze it for your next batch. Leftover cereal? Seal the bag tightly with a clip—it’s perfect for a snack or to make a half-batch of bars later.
If you have extra marshmallows, toss them in a freezer bag. Frozen marshmallows toast beautifully over a fire or can be used straight from frozen in hot cocoa. Stale cereal? Crush it up and use it as a crispy topping for yogurt or ice cream. For another great way to use seasonal ingredients without waste, check out my pumpkin pie crumble bars.
Nutrition Notes
This is a treat, so let’s be real about it. Enjoy it mindfully as part of a balanced diet.
- These are a dessert, best enjoyed in moderation.
- Using a whole-grain crispy rice cereal can add a tiny fiber boost.
- You can reduce the butter to 3 tablespoons if you want to cut a small amount of fat, but the texture will be slightly chewier.
- For a nutty twist, swap 1 cup of cereal for toasted oats.
Common Questions About This Recipe
Here are answers to the questions I get asked the most often about these bars.
Can I make these without a stove?
Absolutely! You can melt the butter and marshmallows together in a large, microwave-safe bowl. Heat in 30-second bursts, stirring well between each, until smooth. Then proceed with the recipe. It’s the ultimate easy dessert hack.
My bars are super hard to cut. What did I do wrong?
This usually means the marshmallow mixture got a little too hot or cooked too long. Next time, use the lowest heat possible and remove the pot as soon as the marshmallows are just melted. Also, a sharp knife sprayed lightly with cooking spray makes cutting much smoother.
How long do these stay fresh?
Store them in an airtight container at room temperature for up to 4 days. They are best within the first 2 days. For longer storage, you can freeze the whole pan, tightly wrapped, for up to 2 months.
See? Creating incredible, crowd-pleasing treats doesn’t require a chef’s budget or a pastry degree. It just takes a few smart choices and one reliable recipe. This one has saved my bacon (or should I say, my sweet tooth) more times than I can count. For another fantastic mash-up of flavors, my pumpkin banana bread bars are a must-try for fall.
I hope this recipe becomes your new favorite cheap and cheerful dessert. It’s a classic for a reason. Now I want to hear from you! Did you add any fun mix-ins? What’s your best budget baking tip? Let me know your own money-saving twists for this recipe in the comments below! Please leave a rating!