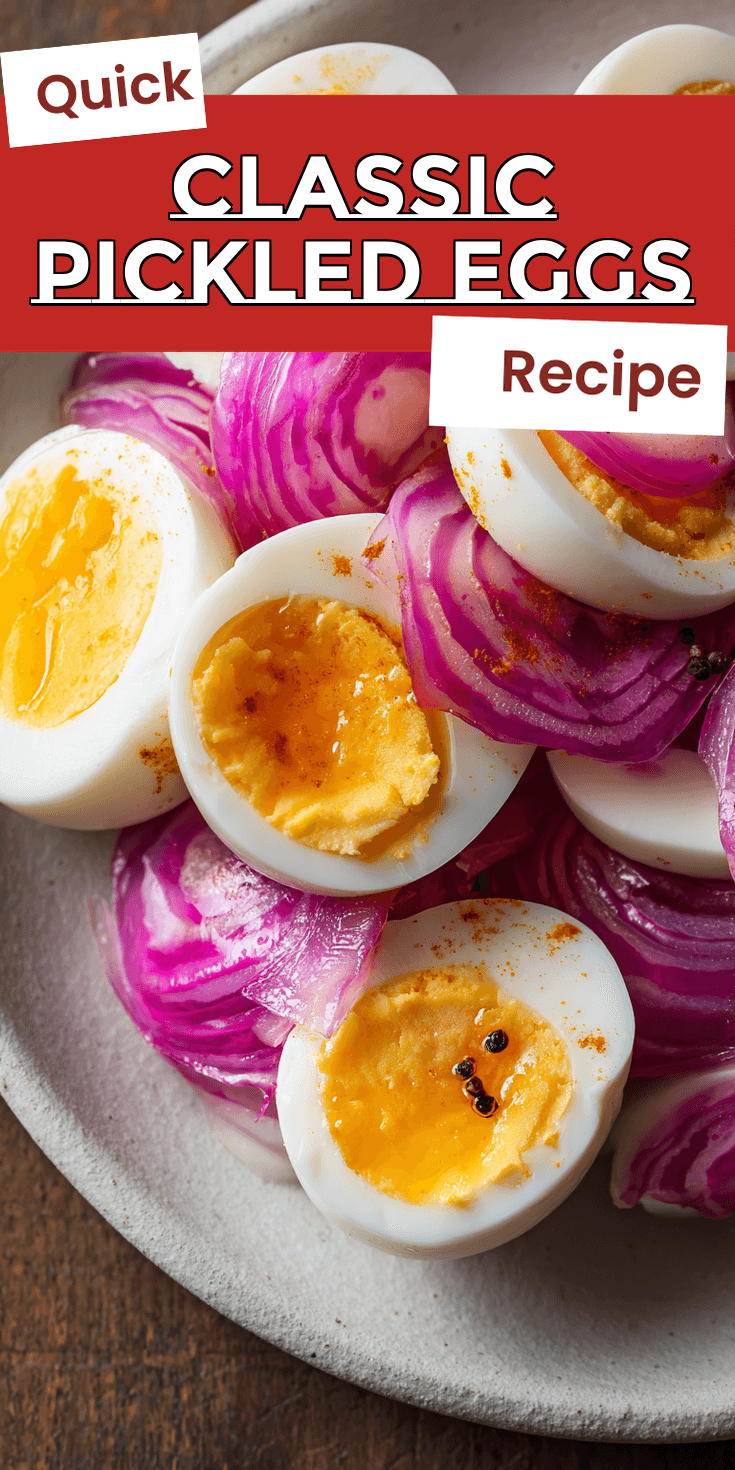
You think you know how to make classic pickled eggs. You’ve probably boiled a dozen, mixed some vinegar with spices, and waited.
But I bet they never tasted quite like the ones from that perfect old deli. The ones with that deep, complex flavor and a texture that’s firm, not rubbery.
There’s a reason for that. It’s not just about the brine. It’s about one quiet, forgotten step that happens before the eggs even see the jar. Let me show you how to master this classic preservation technique, much like the care that goes into a perfect Homemade Classic French Ratatouille.
Recipe Overview
- Cuisine: American / Preservation
- Category: Appetizer, Snack
- Prep Time: 20 minutes
- Cook Time: 15 minutes
- Total Time: 5 days (for curing)
- Servings: 12 pickled eggs
The Secret Ingredient That Makes All the Difference
It’s not in the brine. It’s in the pot. The secret is steaming your eggs, not boiling them.
Boiling shocks the eggs. It often leads to that frustrating green ring around the yolk and can make the whites tough. Steaming is gentle and even. It gives you consistently perfect, easy-to-peel eggs with bright yellow yolks every single time. This is the non-negotiable foundation.
Classic Pickled Eggs Recipe
The “Upgraded” Ingredient List
The Pro-Method (Step-by-Step)
Notes
Enjoy your homemade Classic Pickled Eggs Recipe!
Why This Method is Better (My Pro-Tips)
We’re making refrigerator pickled eggs. This means we skip the canning process and keep them chilled.
It’s safer and gives you more flexibility with your brine. You can play with flavors without worrying about pH levels for shelf-stable storage. The trade-off? They need to stay in the fridge, but the flavor develops beautifully in the cold. It’s a fantastic make-ahead project, similar to preparing a comforting batch of Grandma’s Classic Potato Soup with a Modern Twist for easy weekday meals.
The “Upgraded” Ingredient List
- 12 large eggs, at room temperature
- 3 cups white vinegar (5% acidity)
- 1 cup water
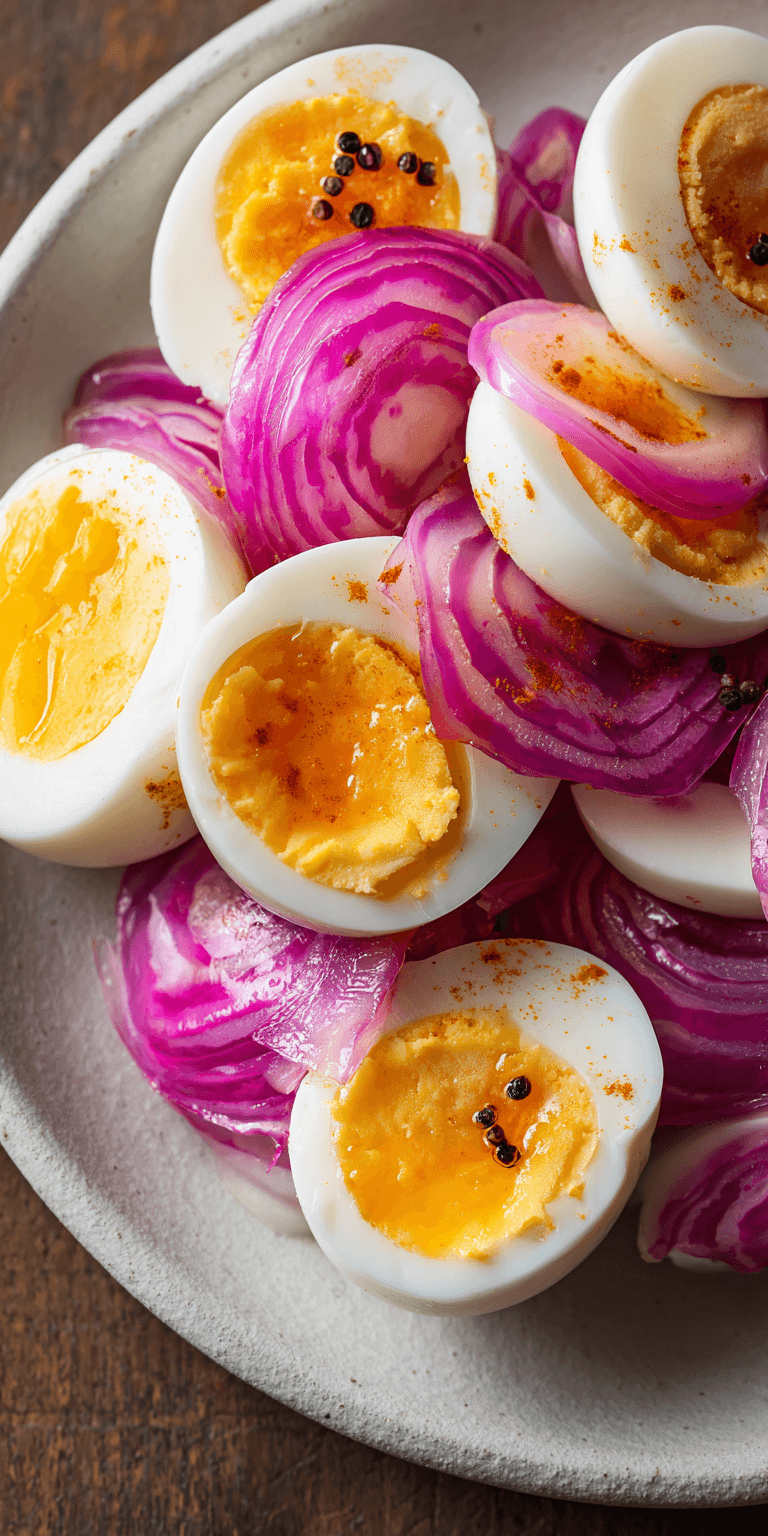
- 1 medium red onion, thinly sliced
- 4 cloves garlic, smashed
- 2 tbsp pickling spice
- 1 tbsp black peppercorns
- 2 tsp kosher salt
- 1-2 dried bay leaves
- Optional: 1 tsp red pepper flakes for heat
The Pro-Method (Step-by-Step)
Follow these steps in order. Patience here builds flavor later.
- Set up a steamer basket in a large pot with 1 inch of water. Bring to a boil over high heat.
- Carefully place your room-temperature eggs in the steamer basket. Cover and steam for 13 minutes exactly.
- Immediately transfer the eggs to a bowl of ice water. Let them cool completely, about 15 minutes.
- Peel the eggs under cool running water. The shells should slip right off.
- In a separate saucepan, combine the vinegar, water, onion, garlic, pickling spice, peppercorns, salt, and bay leaves. Bring to a simmer for 5 minutes, then turn off the heat. Let it cool for 10 minutes.
- Pack the peeled eggs and the sliced onions from the brine into a very clean, large jar.
- Slowly pour the warm brine over the eggs, making sure they are completely submerged.
- Seal the jar and let it cool to room temperature on the counter. Then, move it to the refrigerator.
- Wait at least 5 days before tasting. One week is even better. The flavor needs time to work its way to the center.
Common Mistakes & How to Fix Them
Rubbery Egg Whites: This is from overcooking. If you boil, you gamble. Steaming for 13 minutes is your sweet spot. The ice bath stops the cooking dead in its tracks.
Bland or One-Dimensional Flavor: You didn’t simmer your brine. Heating the brine “wakes up” the spices and helps the salt dissolve. It also softens the onions and garlic, letting them give up their flavor faster. A cold brine poured over eggs takes forever to taste like anything.
Cloudy Brine or Floating Eggs: Cloudiness often comes from using iodized salt. Use pure kosher or pickling salt. If eggs float, they aren’t fully submerged. Use a small fermentation weight or a folded piece of cabbage to keep them under the liquid.
Variations for the Adventurous Cook
Once you master the classic, the jar is your canvas.
For a pickled eggs without sugar but with deep sweetness, add a few slices of raw beet to the jar. It will stain the eggs a gorgeous pink and add an earthy sweetness.
Love heat? Swap the water for the brine from a jar of pickled jalapeños. Add a few of the peppers in with the eggs.
Go for a pub-style flavor. Add a tablespoon of Worcestershire sauce and a teaspoon of mustard powder to your simmering brine.
Nutrition Notes
- These are estimates per pickled egg.
- Calories: ~80
- Protein: 6g
- Fat: 5g
- Carbs: <1g
- Sodium: ~200mg (varies with brine)
Your Pro-Level Questions Answered
How long do homemade pickled eggs last?
In the refrigerator, properly stored and fully submerged, they will keep for 3-4 months. The texture will begin to change after that. Always use a clean fork to remove them.
Can I reuse the pickled egg brine recipe?
You can, but only once. Use it to pickle a new batch of eggs within a week. The vinegar strength and flavor will be weaker the second time. Never reuse it for canning.
Why do you insist on room-temperature eggs?
Cold eggs going into hot steam can crack. Letting them sit out for 30 minutes prevents this waste and gives you a more even cook from shell to yolk.
A Few Final Secrets
The best pickled eggs in a jar are a lesson in patience. Don’t rush the cure.
Label your jar with the date. It’s easy to forget when you made them. The flavor peaks around the two-week mark. Share them with friends who appreciate a real, from-scratch snack. They’re the perfect tangy counterpart to a hearty, Classic 7 Can Taco Soup on a busy weeknight.
Now you have the real method—the one that skips the shortcuts and gets the legendary result. I want to hear from you. Did steaming change the game for your eggs? What wild variation did you try? Tell me all about it in the comments below and rate this recipe if you loved it!