Ever feel like you’re running a tiny, very opinionated restaurant instead of a family kitchen? I get it. One kid won’t eat anything green, another turns their nose up at anything “squishy,” and finding a snack that doesn’t send them bouncing off the walls is a whole other battle.
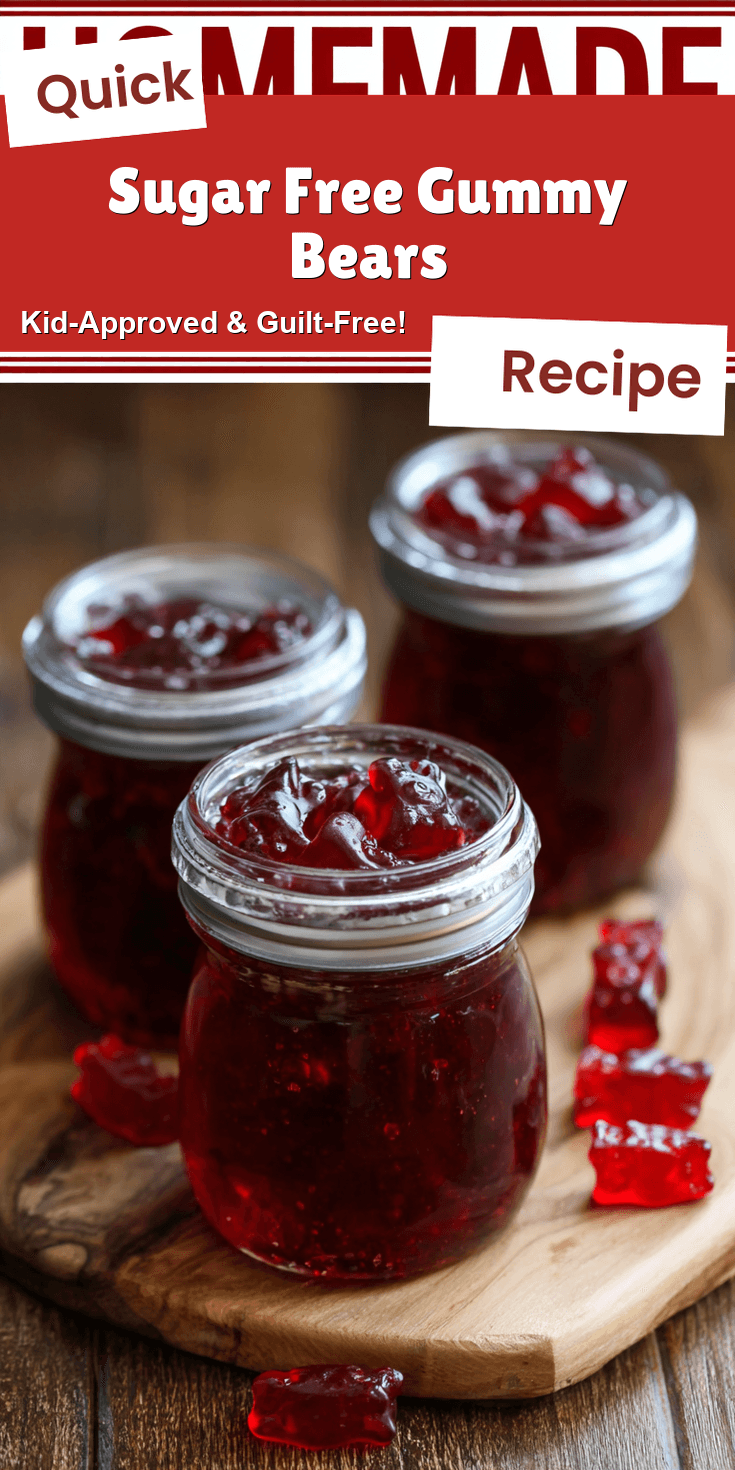
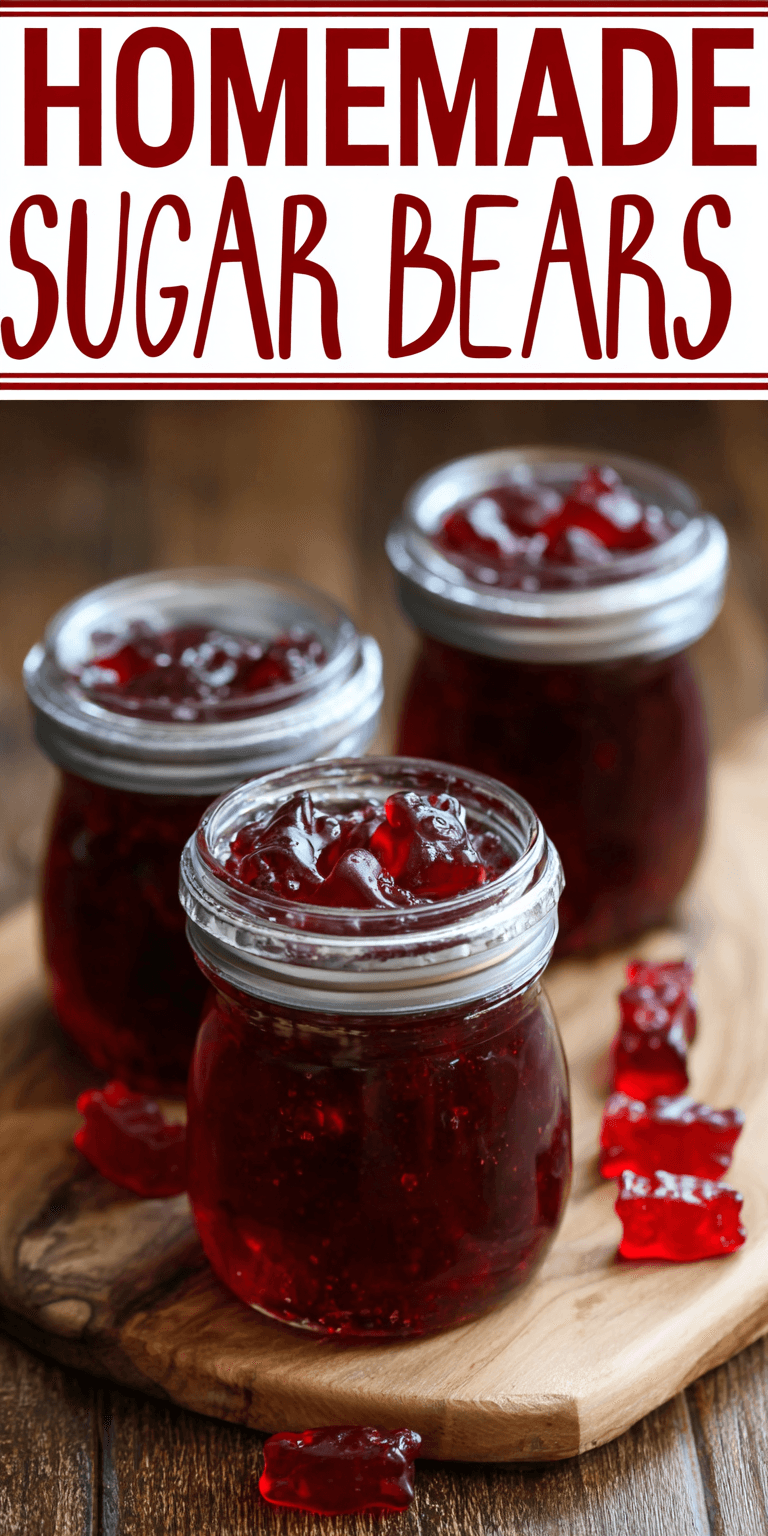
That’s why I want to talk about making our own Sugar Free Gummy Bears. I know, I know. The store-bought sugar-free kind have a… reputation. Let’s just say they’re known for more than their flavor. But the homemade version? It’s a total game-changer. We control everything that goes in, and the result is a chewy, fruity treat my kids actually beg for. It’s part of my mission to create healthier homemade snacks, like these delicious sugar-free cinnamon banana chips.
This isn’t about being perfect. It’s about finding a sweet spot (pun intended!) where we can give our kids a fun snack without the sugar crash. It’s easier than you think, and the best part? The kids can help make them. Let’s dig into how a little gelatin powder and fruit juice can save the snack-time day.
Recipe Overview
- Cuisine: Homemade Treat
- Category: Snack, Candy
- Prep Time: 15 minutes
- Cook Time: 5 minutes
- Total Time: 4 hours 20 minutes (includes setting)
- Servings: Makes about 100 small gummy bears
Why Even My Picky Eaters Love This!
My kids are the first to detect a “hidden” vegetable from a mile away. The beauty of this recipe is its honesty. It looks and tastes like a fun, chewy candy. They get to pick their favorite fruit juice flavor, which makes them feel in charge. The texture is spot-on—perfectly wiggly and satisfying to chew. Because there’s no weird sugar rush and crash afterward, I love it just as much as they do. It’s a win-win snack.
Sugar Free Gummy Bears Recipe
Our Family-Friendly Ingredient List
The Full Step-by-Step Instructions
Notes
Enjoy your homemade Sugar Free Gummy Bears Recipe!
Our Family-Friendly Ingredient List
You probably have most of this in your pantry right now. I promise there are no strange chemicals or hard-to-find items here. This list is all about keeping things simple and recognizable.
- 1 cup 100% fruit juice (like apple, orange, or berry blend)
- 4 tablespoons (about 4 packets) unflavored gelatin powder
- 2-3 tablespoons honey or pure maple syrup (optional, for a touch of sweetness)
- 1 tablespoon lemon juice (brightens the flavor)
- Gummy bear molds (A small silicone mold is the only special tool you need!)
How to Get the Kids Involved in Cooking This
This is where the magic happens. When kids help make their food, they’re way more likely to try it. These tasks are safe, easy, and make them feel like little kitchen scientists.
First, let them be the Juice Selector. Give them two or three juice options and let them pick the “flavor of the day.” It gives them ownership right from the start.
Second, put them in charge of Sprinkling the Gelatin. Have them slowly sprinkle the gelatin powder over the juice while you whisk. They love watching it “bloom” and turn the mixture into a weird, wobbly science experiment. For another kid-friendly project, check out my full sugar-free cinnamon air fryer banana chips recipe.
The Full Step-by-Step Instructions
Don’t let the word “candy” scare you. This process is straightforward. The most important part is patience while they set. You’ve got this!
- Place your gummy bear molds on a flat baking sheet for easy moving.
- Pour the 1 cup of fruit juice into a small saucepan. Sprinkle the gelatin powder evenly over the top. Let it sit for 5 minutes to bloom. It will look wrinkly and thick.
- Place the saucepan over very low heat. Gently warm the mixture, whisking constantly, for 3-5 minutes. Your goal is to dissolve all the gelatin completely. You should not see any granules. Do not let it boil.
- Remove the pan from the heat. Whisk in the lemon juice and the optional honey or maple syrup, if using.
- Carefully pour the liquid into a small measuring cup with a spout. This makes the next step much less messy.
- Slowly pour the mixture into each cavity of the gummy bear mold. You can also use a dropper for more precision.
- Carefully transfer the baking sheet with the filled molds to the refrigerator. Let them set completely for at least 4 hours, or overnight is even better.
- Once firm, pop the gummy candies out of the molds. They’re ready to eat!
Fun Twists for Different Tastes
This basic recipe is like a blank canvas. You can change it up every time to keep things exciting and please every palate in your house.
For a vitamin boost, mix in a splash of liquid kids’ vitamins into the juice before adding the gelatin. For a creamy, yogurt-like version, use half juice and half plain yogurt or a smoothie. You can even add a teaspoon of chia seeds for a fun texture. If you have a child who loves sour things, roll the finished gummies in a little citric acid powder (find it in the baking aisle).
Storing & Reheating (Perfect for Busy Nights)
The good news is, these store beautifully! I always make a double batch. Keep them in an airtight container in the fridge for up to two weeks. They might stick together a little, so you can dust them with a tiny bit of cornstarch. You can also freeze them for up to 3 months. There’s no need to reheat—they’re a perfect grab-and-go snack straight from the fridge.
Nutrition Notes
Compared to store-bought gummy candy, this homemade swap is a big improvement. Here’s the simple breakdown:
- No refined sugars (if you skip the optional honey/maple syrup).
- Source of protein from the gelatin, which is great for little growing bodies.
- Natural fruit flavors without artificial dyes.
- Gelatin may support gut and joint health.
FREQUENTLY ASKED QUESTIONS
Can I use a different sweetener?
Absolutely! The optional honey or maple syrup is just for a touch of sweetness. You can skip it entirely if your juice is sweet enough. You could also try a few drops of liquid stevia. I don’t recommend granulated sugar substitutes, as they can change the texture.
My mixture got lumpy! What do I do?
This happens to me sometimes if the heat is too high. Don’t panic! Just take the pan off the heat and keep whisking vigorously. You can also pour the mixture through a fine-mesh strainer to catch any stubborn lumps before pouring it into the molds.
Where did you get your gummy bear molds?
I found my silicone molds online or at a local craft store. They’re very inexpensive and last forever. Any small silicone mold will work—hearts, stars, dinosaurs. Let the kids pick a shape they love!
So, there you have it. A snack-time solution that’s fun to make, better for them, and actually gets eaten. It’s one less thing to fight about, and that’s a victory in my book. The look on their faces when they pop out their own custom-made gummy bears is worth every minute. If you’re looking for another festive, sugar-conscious treat, my pumpkin spice sugar cookies are always a hit.
I’d love to know if this was a hit with your family! What juice flavor did your kids choose? Please leave a comment and rating below!