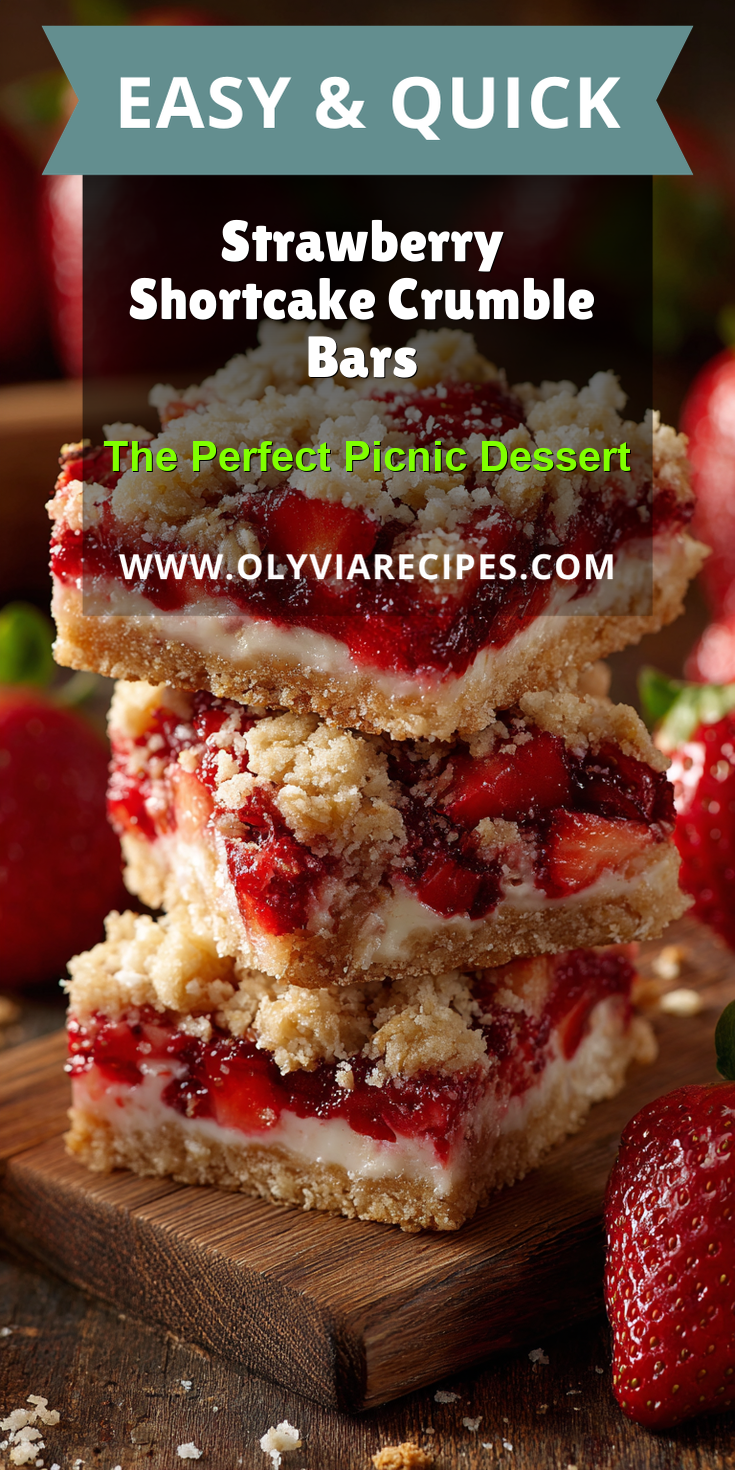

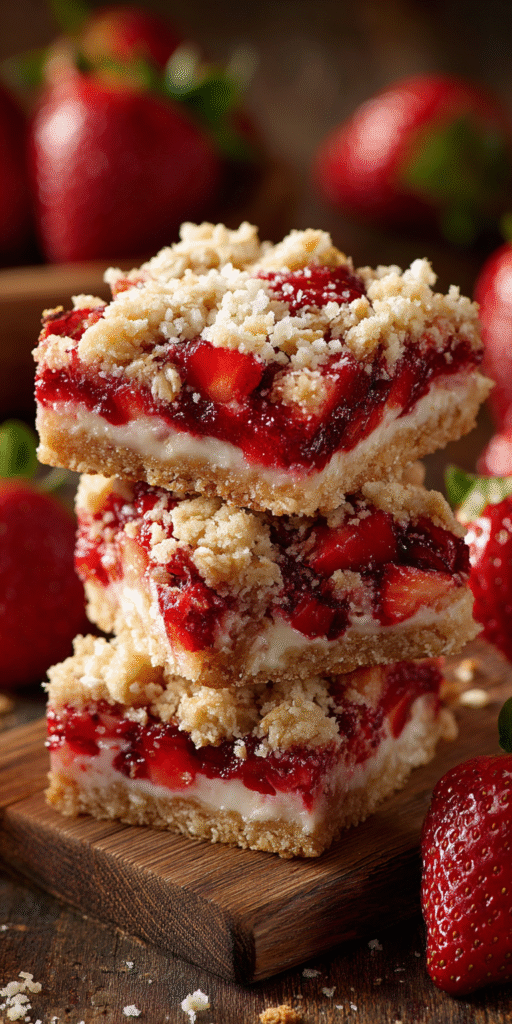
Some recipes just feel like a warm hug. For me, Strawberry Shortcake Crumble Bars are one of them. They capture the sweet, juicy heart of summer and wrap it in a buttery, crumbly blanket, much like the cozy comfort of a classic pumpkin pie crumble bar.
This recipe takes me right back to my grandma’s kitchen. The smell of baking oats and bubbling berries would fill the whole house. It was a promise of something wonderful to come.
I want to share that feeling with you. These bars are the perfect mix of a tender shortcake base, a jammy strawberry filling, and a crisp oat topping. They are pure, simple comfort.
Recipe Overview
- Cuisine: American
- Category: Dessert, Snack
- Prep Time: 20 minutes
- Cook Time: 45 minutes
- Total Time: 1 hour 5 minutes (plus cooling)
- Servings: 12 generous bars
The Story Behind This Classic Recipe
This dish is my own happy mash-up of two beloved classics. It has the soul of a old-fashioned strawberry shortcake. It also has the easy, portable charm of a fruit crumble bar.
My grandma made the best strawberry shortcake for Sunday dinners. But for picnics or lunchboxes, she needed something sturdier. Her solution was always a crumble bar of some kind, and she’d often pack a batch of fun treats like Strawberry Shortcake Puppy Chow for good measure.
I combined those two ideas into one. The result is a treat that honors tradition. It’s built for sharing and for making memories wherever you go.
What Makes This the *Traditional* Way
We’re not reinventing the wheel here. The magic is in the familiar, honest ingredients. This is the way it’s been done for generations.
We use real butter for that rich, irreplaceable flavor. Old-fashioned oats give the topping its signature hearty chew. And we sweeten the berries just enough to let their natural brightness shine.
There’s no fancy pastry here. The crust and topping are one simple, forgiving mixture. It’s a time-tested method that always works. That’s the beauty of a true classic.
Strawberry Shortcake Crumble Bars Recipe
The Classic Ingredients (No Fancy Stuff!)
How to Make It Just Like Grandma Did
Notes
Enjoy your homemade Strawberry Shortcake Crumble Bars Recipe!
Nutrition Information
The Classic Ingredients (No Fancy Stuff!)
Gathering these simple ingredients is the first step. Each one plays a key role in creating that perfect texture and taste. You likely have most of them in your pantry right now.
- 2 lbs fresh strawberries, hulled and sliced
- 1/3 cup granulated sugar (for the berries)
- 1 tbsp cornstarch
- 1 tsp fresh lemon juice
- 1 1/2 cups all-purpose flour
- 1 1/2 cups old-fashioned rolled oats
- 1 cup packed light brown sugar
- 1/2 tsp baking soda
- 1/2 tsp salt
- 1 cup (2 sticks) cold unsalted butter, cubed
- 1 tsp pure vanilla extract
How to Make It Just Like Grandma Did
Don’t let the layers fool you. This recipe is wonderfully straightforward. Just follow these steps for a perfect pan of sweet treats every single time.
- First, heat your oven to 350°F. Grease a 9×13 inch baking pan and line it with parchment paper. This makes lifting out the bars so easy later.
- Make the strawberry filling. In a medium bowl, mix the sliced strawberries, 1/3 cup granulated sugar, cornstarch, and lemon juice. Set it aside to get juicy while you make the crust.
- Now, make the crumble. In a large bowl, whisk together the flour, oats, brown sugar, baking soda, and salt.
- Add the cold, cubed butter and vanilla extract to the dry ingredients. Use a pastry cutter or your clean fingers to work it in. Keep going until the mixture looks like coarse, crumbly sand. Some pea-sized butter bits are perfect.
- Press about two-thirds of this crumble mixture firmly into the bottom of your prepared pan. This forms your shortcake base.
- Give the strawberry mixture one more stir. Then, spread it evenly over the pressed crust. Try to leave most of the liquid in the bowl.
- Sprinkle the remaining one-third of the crumble topping evenly over the strawberries. Don’t press it down.
- Bake for 40-45 minutes. You’ll know it’s done when the topping is a deep golden brown and the strawberry filling is bubbling around the edges.
- This is the hardest part! Let the pan cool completely on a wire rack. This allows the filling to set so you can cut clean bars.
My Tips for Perfecting This Classic
A few little tricks can make a big difference. They help you get that ideal texture and flavor we all love.
First, keep your butter cold. This is the secret to a flaky, crumbly topping. If the butter melts before baking, the texture will be off.
Second, let the bars cool fully before you cut them. I know it’s tempting to dig in while they’re warm. But patience gives you neat, perfect squares that hold together.
Finally, taste your strawberries first. If they are very sweet, you can reduce the sugar in the filling a touch. If they’re a bit tart, use the full amount.
How to Store and Enjoy Later
These bars are fantastic picnic food because they travel so well. Once cooled and cut, store them in an airtight container at room temperature for 2 days.
For longer storage, keep them in the fridge for up to 5 days. You can also freeze them for up to 3 months. Just thaw at room temperature when you’re ready for a sweet treat.
I love them just as they are. But a small scoop of vanilla ice cream or a dollop of whipped cream makes them extra special.
Nutrition Notes
This is a dessert, meant to be enjoyed in moderation. Here’s a basic look at what’s in one bar.
- Calories: ~320
- Total Fat: 16g
- Saturated Fat: 10g
- Carbohydrates: 43g
- Fiber: 3g
- Sugars: 24g
- Protein: 3g
Your Questions About This Classic Recipe
Here are answers to a couple of common questions I get about this comfort food.
Can I use frozen strawberries?
You can, but you don’t need to thaw them first. Just toss the frozen berries with the sugar and cornstarch. You may need to add 5-10 minutes to the bake time since they start out colder.
Can I use quick oats instead of old-fashioned?
I don’t recommend it. Old-fashioned oats give the topping its wonderful chewy texture. Quick oats are cut smaller and can make the topping a bit mushy. For the best result, stick with old-fashioned.
My filling is very runny. What happened?
This usually means the bars needed more time to cool and set. The cornstarch needs time to work its magic as the bars cool. Make sure you let them cool completely before cutting.
I hope this recipe finds its way into your kitchen and your heart. It’s a little piece of my family tradition that I’m so happy to pass on.
Baking these bars fills your home with the most comforting smell. It’s the smell of summer, of patience, and of simple joys. That’s a feeling worth sharing, whether you’re making these bars, a batch of strawberry yogurt bites, or any other treat that brings your family together.
I’d love to hear about your baking day. Did your family love these fruit bars? Share your own stories and photos in the comments below, and please leave a rating to let me know how it went!