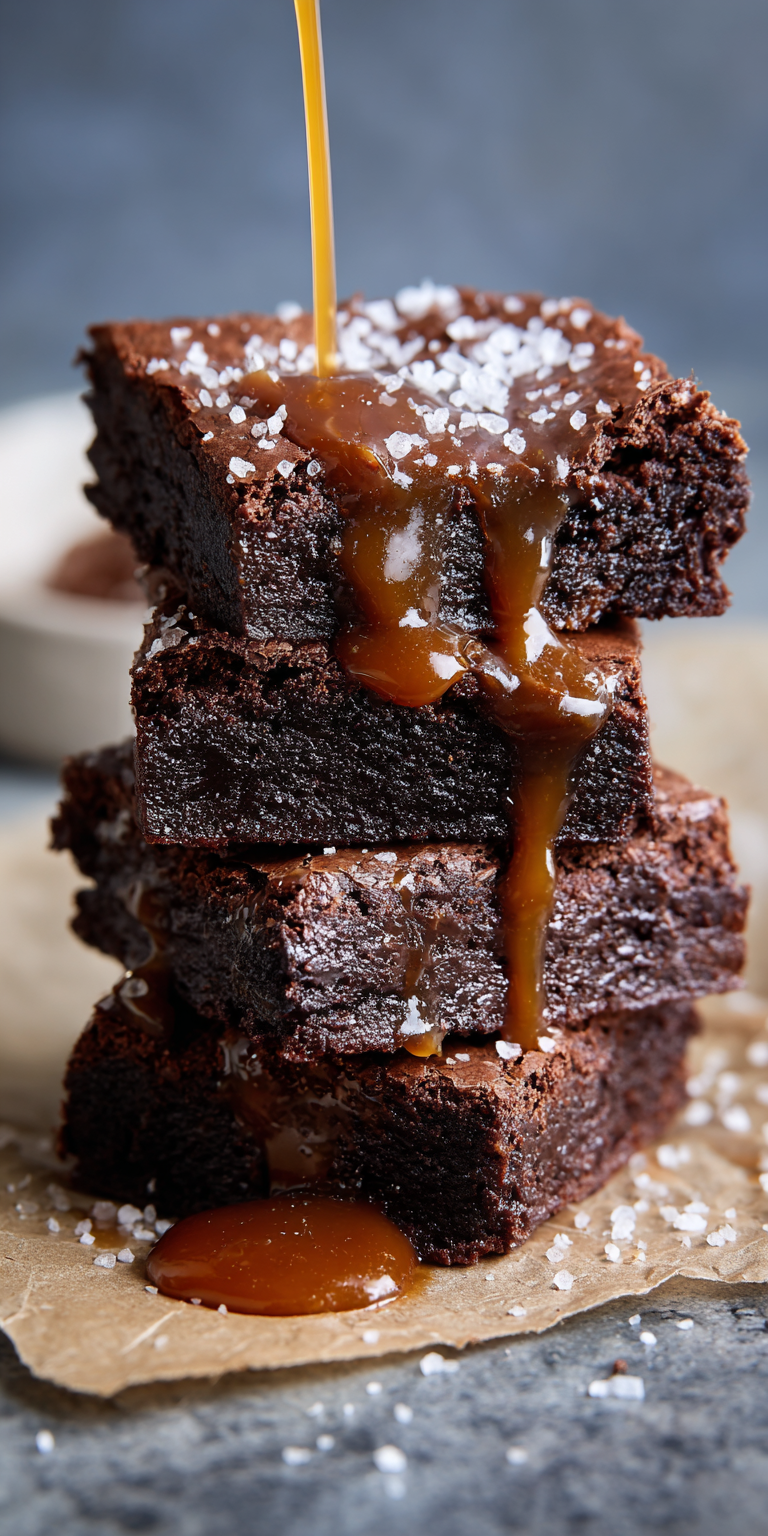
You’ve made a brownie before. You’ve probably even made one with caramel. But I can tell you with absolute confidence: you’ve never made a Salted Caramel Brownie Dessert like this. If you love the sweet and salty combo, you should definitely explore our salted caramel cheesecake recipe next.
This isn’t just another recipe. It’s a masterclass in texture and flavor control. I’m going to show you the one secret that changes everything from a simple sweet treat to a professional-level dessert.
Ready to find out what it is? Let’s get started.
Recipe Overview
Here’s the quick look at what we’re making today. This is your roadmap to the ultimate fudgy brownie.
- Cuisine: American
- Category: Dessert
- Prep Time: 20 minutes
- Cook Time: 35 minutes
- Total Time: 55 minutes (plus cooling)
- Servings: 16 rich squares
The Secret Ingredient That Makes All the Difference
I’ve tested every trick in the book. The real game-changer isn’t a fancy chocolate. It’s something much simpler.
The secret is instant espresso powder. Before you say “I don’t like coffee,” hear me out. You won’t taste it. Not even a little.
What it does is deepen the chocolate flavor in a way nothing else can. It makes the cocoa taste richer, darker, and more complex. It’s the quiet powerhouse that makes people ask, “What is *in* these?”
Why This Method is Better (My Pro-Tips)
We’re not just mixing and baking. We’re building layers of flavor and texture with intention. That’s what separates a good brownie from a great one.
First, we make our own salted caramel. Store-bought is fine in a pinch, but homemade is fluid and integrates perfectly. For another fantastic use of homemade caramel, try making these irresistible salted caramel cracker bites. Second, we use a specific mixing method for the batter. It creates that shiny, crackly top every single time.
Salted Caramel Brownie Dessert Recipe

The “Upgraded” Ingredient List
The Pro-Method (Step-by-Step)
Notes
Enjoy your homemade Salted Caramel Brownie Dessert Recipe!
Nutrition Information
Finally, we don’t just swirl the caramel on top. We layer it *inside* the batter. This gives you a ribbon of gooey caramel in every single bite.
The “Upgraded” Ingredient List
Quality matters here. Use the best you can find, especially for the chocolate and salt.
- 1 cup (2 sticks) unsalted butter
- 8 oz high-quality semi-sweet chocolate, chopped
- 1 1/2 cups granulated sugar
- 4 large eggs, at room temperature
- 1 tbsp pure vanilla extract
- 1 cup all-purpose flour
- 1/2 cup Dutch-process cocoa powder
- 1 tsp instant espresso powder (the secret!)
- 1/2 tsp fine sea salt
- For the Salted Caramel:
- 1 cup granulated sugar
- 6 tbsp unsalted butter, cubed
- 1/2 cup heavy cream, warm
- 1 1/2 tsp flaky sea salt (like Maldon)
The Pro-Method (Step-by-Step)
Follow these steps in order. Patience here pays off in texture.
- Make the Caramel First: Melt the sugar in a heavy saucepan over medium heat. Stir until it’s a deep amber liquid. Take it off the heat and whisk in the butter—it will bubble violently. Once smooth, whisk in the warm cream and 1 tsp of the flaky salt. Let it cool completely.
- Prep and Melt: Heat your oven to 350°F (175°C). Line a 9×13 inch pan with parchment paper. Melt the butter and chopped chocolate together in a bowl over simmering water. Let it cool slightly.
- Build the Batter Base: Whisk the sugar into the warm chocolate mixture. Then, whisk in the eggs, one at a time, beating well after each. Stir in the vanilla.
- Incorporate the Dry Goods: Sift the flour, cocoa powder, espresso powder, and fine sea salt right over the wet mix. Fold gently with a spatula until just combined. Overmixing is the enemy of a fudgy crumb.
- Layer, Don’t Just Swirl: Pour half the brownie batter into your pan. Drizzle about 2/3 of the cooled caramel over it. Spoon the remaining batter on top. Then, drizzle the rest of the caramel over that.
- Create the Swirl: Use a knife or skewer to gently swirl the top layer of caramel into the top layer of batter. You want pockets, not a homogenous mix.
- Bake to Perfection: Bake for 30-35 minutes. The top should be shiny and cracked, and a toothpick inserted near the center should come out with moist crumbs, not wet batter.
- The Crucial Rest: Let the pan cool completely on a rack. Sprinkle with the remaining 1/2 tsp of flaky salt. This is non-negotiable for the perfect texture.
Common Mistakes & How to Fix Them
Even pros run into issues. Here’s how to solve the big ones.
Problem: The caramel sinks to the bottom and makes a soggy layer.
Fix: Your caramel was too warm or too thin. Make sure it’s cooled to room temperature and has thickened before you layer it. A thicker caramel stays put.
Problem: The brownies are cakey, not fudgy.
Fix: You likely over-mixed the batter after adding the flour. Fold, don’t beat. Also, check your bake time—overbaking dries them out.
Problem: The top isn’t shiny and crackly.
Fix: You didn’t dissolve the sugar enough in the eggs. Whisk the sugar and eggs vigorously for a full minute. That dissolves the sugar and creates that signature top.
Variations for the Adventurous Cook
Once you’ve mastered the base, play with it. That’s where the real fun begins.
Swap the semi-sweet chocolate for a dark chocolate with 70% cacao. It creates a more intense, adult dessert. Add 3/4 cup of toasted pecans or walnuts to the batter for a crunchy contrast.
For a next-level box mix hack, use a high-quality dark chocolate mix. Add the instant espresso powder to the dry mix. Use melted butter instead of oil, and an extra egg yolk. Then layer with your homemade caramel as above.
Nutrition Notes
Let’s be real—this is a celebratory dessert. Enjoy it as such.
- Calories: ~380 per serving
- Total Fat: 22g
- Saturated Fat: 13g
- Cholesterol: 85mg
- Sodium: 220mg
- Total Carbohydrates: 45g
- Sugars: 35g
- Protein: 4g
Your Pro-Level Questions Answered
These are the questions I get from bakers who want to understand the “why.”
Can I make the caramel ahead of time?
Absolutely. Make it up to 3 days ahead. Store it in a jar in the fridge. Gently warm it on the stove or in the microwave until it’s a pourable consistency again before using.
Dutch-process vs. natural cocoa powder?
I specify Dutch-process for a reason. It’s treated with an alkali, making it less acidic and giving a deeper, smoother chocolate flavor. It’s key for that rich, dark color and taste.
How do I get clean, sharp cuts on my brownies?
Chill the entire pan of cooled brownies for an hour. Use a long, sharp knife. Clean the blade with hot water and dry it between each cut. This gives you those gorgeous, professional edges.
A Few Final Secrets
You now have the blueprint. But the real magic is in the details. The patience to let the caramel cool. The restraint to not overmix. The willpower to let them set.
That espresso powder? It’s your new best friend. Use it in every chocolate cake, too. It’s the insider trick that makes your baking taste like it came from a specialty shop.
This recipe is your foundation. Master it. Then make it your own. That’s what being a true cook is all about. And if you’re looking for a lighter, crunchy treat that still satisfies that salted caramel craving, you have to try these salted caramel air fryer banana chips.
Now that you have the secret, go try it! I want to hear all about it. Did that espresso powder change the game for you? What variations did you try? Let me know in the comments below—and don’t forget to rate this recipe!