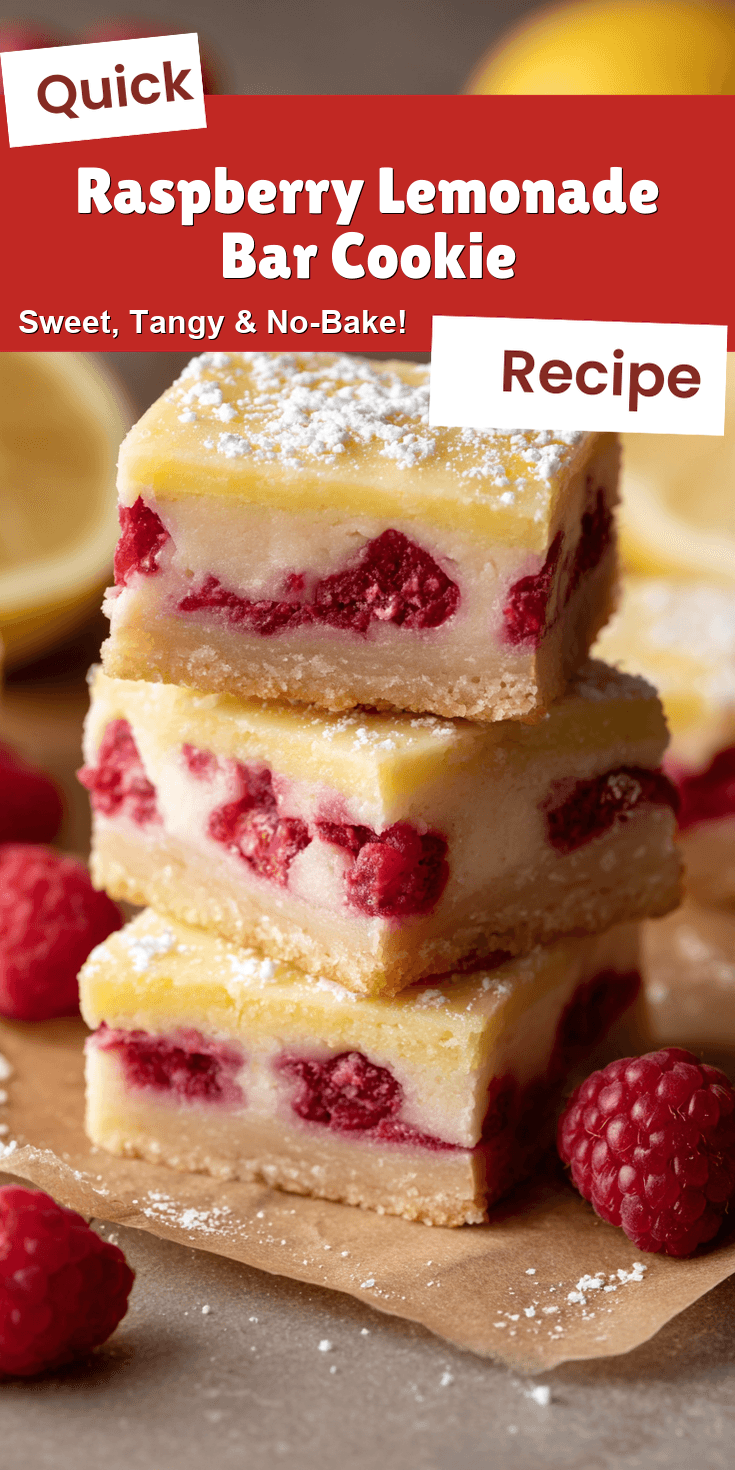
Some recipes just feel like a warm hug. For me, this classic Raspberry Lemonade Bar Cookie is one of them. It’s the taste of a sunny afternoon on the porch swing, with a cold glass in hand. If you’re looking for another refreshingly unique lemonade twist, you have to try our pickle lemonade.
It takes me right back to my grandma’s kitchen. She always knew how to turn simple, tart lemons and sweet berries into something magical. These bars are that magic, baked into a treat that’s both nostalgic and new.
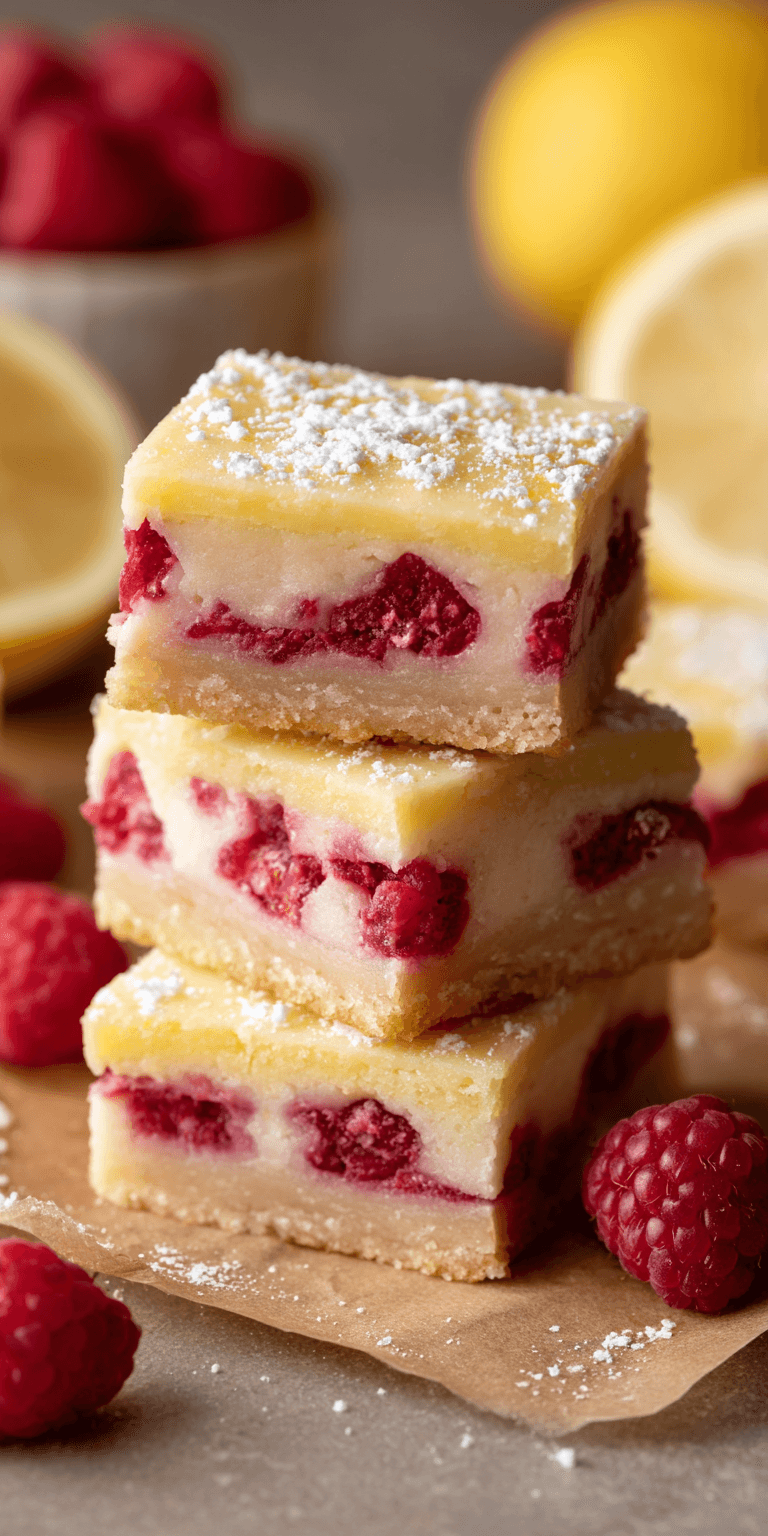
They’re the perfect blend of sweet and tart, with a buttery crust and a bright, pink filling. Whether you call them cookie bars or tart bars, they’re a true comfort food. They’re also such pretty food, ideal for a baby shower or any gathering where you want a smile.
Recipe Overview
- Cuisine: American
- Category: Dessert, Cookie Bars
- Prep Time: 20 minutes
- Cook Time: 35 minutes
- Total Time: 55 minutes (plus cooling)
- Servings: 16 bars
The Story Behind This Classic Recipe
This recipe is my own love letter to old-fashioned pink lemonade stands. As a kid, I’d mix that sugary powder with water, feeling so proud of my creation.
Raspberry Lemonade Bar Cookie Recipe
The Classic Ingredients (No Fancy Stuff!)
How to Make It Just Like Grandma Did
Notes
Enjoy your homemade Raspberry Lemonade Bar Cookie Recipe!
I wanted to capture that same joyful, sun-kissed flavor in a bake-sale worthy treat. These bars are my answer. They have that same nostalgic blush and puckery sweetness, but in a form you can hold in your hand.
They’ve become my go-to for bridal showers and summer parties. There’s something about that pink hue that just makes people happy. It’s a little taste of childhood, shared with friends.
What Makes This the *Traditional* Way
We’re not reinventing the wheel here. The best comfort food relies on time-tested methods and honest ingredients.
The traditional way is all about that shortbread-like crust. It’s a simple mix of butter, flour, and sugar, pressed—not rolled—into the pan. This creates a sturdy, crumbly base that can hold the lush filling.
The filling itself gets its signature flavor from real lemon juice and zest. We boost it with raspberry jam or puree for that classic pink lemonade color and a berry-kissed tartness. No artificial mixes or complicated steps are needed.
The Classic Ingredients (No Fancy Stuff!)
Let’s keep it simple. You likely have most of this in your pantry already. That’s the beauty of a classic recipe.
- For the Crust:
- 1 cup (2 sticks) unsalted butter, softened
- 1/2 cup granulated sugar
- 2 cups all-purpose flour
- 1/4 teaspoon salt
- For the Filling:
- 4 large eggs
- 1 1/2 cups granulated sugar
- 1/2 cup fresh lemon juice (about 3 lemons)
- 1 tablespoon lemon zest
- 1/3 cup all-purpose flour
- 1/2 cup seedless raspberry jam
- Red food coloring (optional, for a brighter pink)
- For Dusting:
- Powdered sugar
How to Make It Just Like Grandma Did
Don’t be intimidated. These bars come together in just a few simple steps. The key is to take your time and not rush the process.
- Heat your oven to 350°F (175°C). Line a 9×13 inch baking pan with parchment paper, letting it hang over the sides. This makes it so easy to lift out the whole slab later.
- Make the crust. In a bowl, cream the softened butter and 1/2 cup sugar until it’s light and fluffy. Gradually mix in the 2 cups of flour and salt until a soft dough forms.
- Press this dough evenly into the bottom of your prepared pan. I use my fingers or the bottom of a measuring cup to get it nice and flat. Bake for 15-18 minutes, until the edges are just barely golden.
- While the crust bakes, make the filling. Whisk the eggs and 1 1/2 cups sugar together until smooth. Whisk in the fresh lemon juice, lemon zest, and 1/3 cup flour.
- Warm the raspberry jam for about 15 seconds in the microwave so it’s loose. Stir it into the lemon mixture. If you want a vibrant pink color, add a drop or two of red food coloring now.
- When the crust is done, pull it from the oven. Pour the pink lemonade filling right over the hot crust. Carefully return the pan to the oven.
- Bake for another 20-25 minutes. The filling should be set and not jiggle in the center when you gently shake the pan.
- Let the pan cool completely on a wire rack. Then, use the parchment paper to lift the whole block out. Chill it in the fridge for at least an hour before cutting. This gives you those clean, sharp edges.
- Dust the top with a generous snowfall of powdered sugar. Cut into squares and serve.
My Tips for Perfecting This Classic
A few little tricks can make a big difference. They’re the kind of tips passed down over a kitchen counter.
First, use real lemons. The bottled juice just doesn’t have the same bright, lively flavor. Zest your lemons before you juice them—it’s much easier.
Second, make sure your crust is fully pre-baked and slightly golden before adding the filling. This prevents a soggy bottom and gives you that perfect textural contrast.
Finally, patience is key. Let the bars cool and then chill thoroughly before you cut them. A hot knife will make a messy, gooey cut. A cold one gives you those beautiful, clean lines. For another treat that requires a bit of patience for the perfect set, check out our recipe for Protein Cookie Dough.
How to Store and Enjoy Later
These bars are wonderful for making ahead. They keep their flavor and texture beautifully.
Store them in an airtight container in the refrigerator for up to 5 days. The powdered sugar will melt into the top, so you may want to dust them again just before serving.
You can also freeze them for up to 2 months. Layer them between sheets of parchment in a freezer-safe container. Thaw overnight in the fridge.
Nutrition Notes
This is a treat, through and through. Here’s a simple breakdown per bar.
- Calories: ~280
- Total Fat: 12g
- Saturated Fat: 7g
- Cholesterol: 75mg
- Sodium: 50mg
- Total Carbohydrates: 40g
- Sugars: 28g
- Protein: 3g
Your Questions About This Classic Recipe
Here are answers to a couple of common questions I get about this beloved dish.
Can I use frozen raspberries instead of jam?
You can, but it changes the method a bit. Thaw and puree about 1 cup of frozen raspberries, then strain to remove seeds. Simmer the puree with a tablespoon of sugar until it thickens slightly, then let it cool before adding it to the lemon mixture.
My filling didn’t set firmly. What happened?
This usually means it needed a bit more bake time. Ovens can vary. Next time, bake until the center shows no liquid jiggle—it should look set. Chilling it fully will also help it firm up perfectly.
Can I make these less sweet?
You can try reducing the sugar in the filling by 1/4 cup. I wouldn’t go further, as sugar helps with the set and texture. The tart lemon and raspberry really help balance the sweetness, too.
I hope this recipe finds its way into your kitchen and becomes a new tradition. There’s nothing quite like sharing a plate of these sunny, tart-and-sweet bars with the people you love. If you love the lemon-raspberry combo, you’ll adore our Lemon Raspberry Cookies for a zesty summer flavor burst.
It’s more than just a dessert. It’s a moment of sweetness, a bite of nostalgia, and a whole lot of comfort. I’d love to hear if it brings back memories for you, or if your family gives it a thumbs up.
Please let me know how yours turned out in the comments below, and don’t forget to leave a rating!