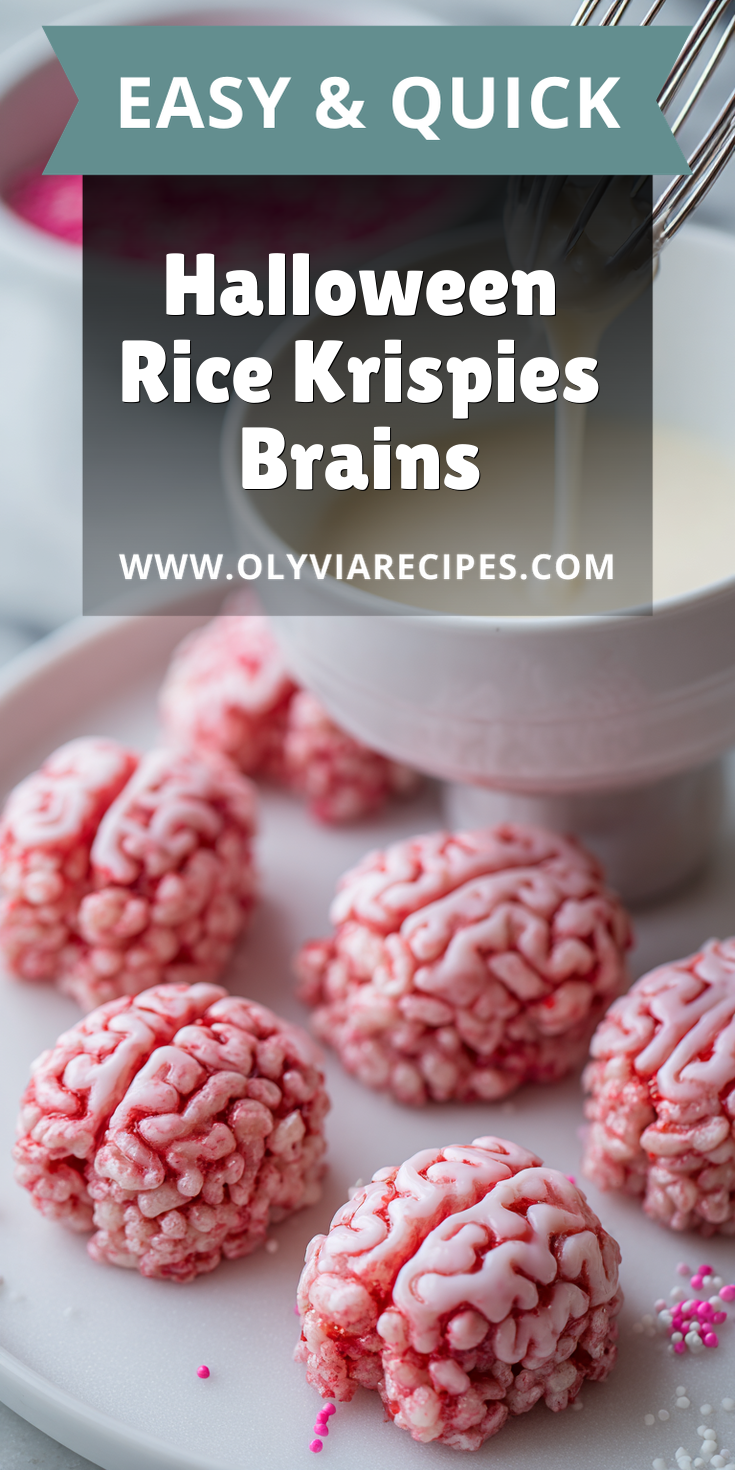
Want to serve something truly memorable at your Halloween gathering that won’t have you scrambling in the kitchen? This Halloween Rice Krispies Brains recipe is my absolute secret weapon for a stress-free, impressive party.
I promise, it looks like you spent hours crafting something spooky and intricate. The truth is, it’s one of the most fun easy recipes I know. You get all the credit for a brilliant, homemade snack with minimal effort, perfect alongside other comforting dishes like our flavorful roasted garlic herb potato soup.
Recipe Overview
Here’s a quick look at what you’re in for with this delightful treat.
- Cuisine: American
- Category: Dessert, Snack
- Prep Time: 20 minutes
- Cook Time: 5 minutes
- Total Time: 25 minutes
- Servings: 8 brains
Why This is My Go-To for Guests
As a host, I live for recipes that make people’s eyes light up. This one never fails. It’s the perfect combination of a fun baking project and a no bake dessert.
The texture is wonderfully chewy, and the pink glaze adds a touch of eerie elegance. It’s a guaranteed conversation starter that fits right in with other party snacks.
Make-Ahead Magic: My Hosting Secret
This is my number one tip for effortless entertaining. You can make the entire recipe up to two days before your event.
Simply prepare the brains, let them set, and store them in a single layer in an airtight container. On party day, you just take them out and place them on your platter. It’s that simple.
Halloween Rice Krispies Brains Recipe

PREPARATION
Notes
Enjoy your homemade Halloween Rice Krispies Brains Recipe!
Nutrition Information
PREPARATION
Follow these simple steps for perfect brains every single time. I like to get all my ingredients measured out before I start. This hands-off approach is similar to making a crockpot lasagna soup for effortless comfort.
- Melt the butter in a large pot over low heat. Add the marshmallows and stir until they are completely melted and smooth.
- Remove the pot from the heat and immediately stir in the Rice Krispies cereal until it’s fully coated in the marshmallow mixture.
- Let the mixture cool just enough so you can handle it. Then, lightly grease your hands with butter or cooking spray.
- Take a generous handful of the mixture and shape it into a log. Gently pinch the middle to create that classic brain-like two-lobed shape.
- Use the back of a butter knife or a chopstick to carefully press a wavy, squiggly line down the center and along the sides to create the brain’s “convolutions.”
- Place each formed brain on a baking sheet lined with parchment paper and let them cool completely.
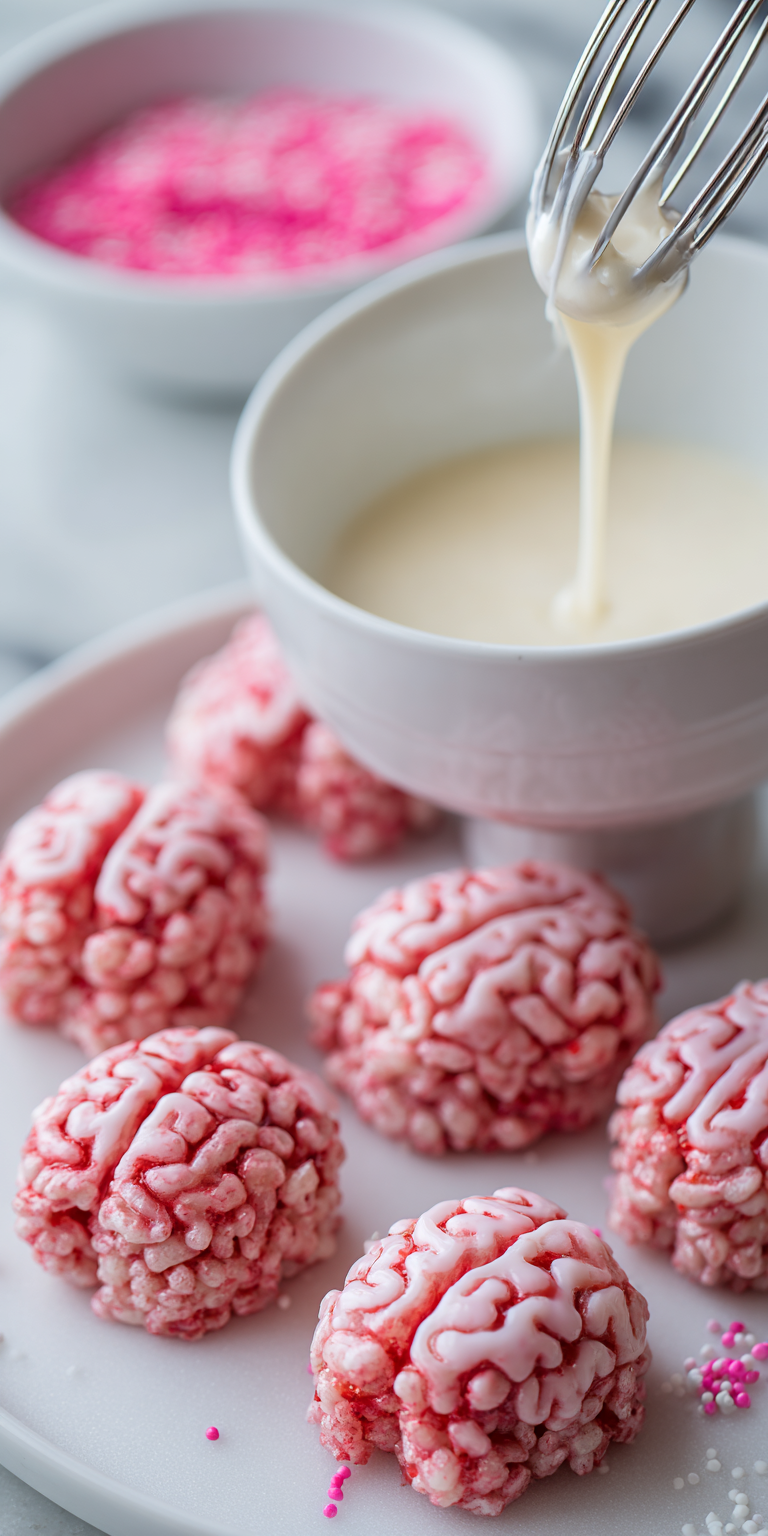
- For the glaze, whisk together the powdered sugar, milk, and vanilla extract until smooth. Add red food coloring, one drop at a time, until you get a pale pink or deeper red color, depending on your preference.
- Drizzle the pink glaze over the cooled brains, letting it drip down the sides into the grooves for a wonderfully gory effect.
How to Serve This Like a Pro
Presentation is everything. For a real “wow” moment, place your brains on a dark-colored platter or a slab of slate.
You can add a few plastic spiders or a dusting of edible green glitter around them for an extra spooky vibe. It makes them look like they came straight from a mad scientist’s lab.
Perfect Pairings (What to Drink & Serve With It)
These sweet treats play well with so many other food dishes. They are fantastic for a dessert table or as a standout sweet snack. For a quick and savory main course that complements these brains perfectly, try our quick weeknight lasagna soup ready in under 30 minutes.
I love serving them with a pitcher of cold apple cider or a bubbling witch’s cauldron of hot chocolate. For a savory balance, offer some simple cheese and crackers or a bowl of pretzels nearby.
Nutrition Notes
While this is definitely a treat, it’s helpful to know what you’re serving. These are approximate values per serving.
- Calories: ~220
- Carbohydrates: 45g
- Sugar: 28g
- Fat: 4.5g
- Protein: 1g
Your Entertaining FAQs
Here are answers to the questions I get asked the most when I serve these at my parties.
Can I make these with different cereals?
Absolutely! While Rice Krispies give the perfect texture, you can try this with corn flakes or even a chocolate-flavored rice cereal for a different look and taste. It’s a great way to get creative.
How far in advance can I really make these?
You can make them up to two days ahead. Just make sure they are stored in an airtight container at room temperature to keep them fresh and chewy. They are the ultimate make-ahead party snack.
Are these okay for young kids at a party?
Yes, they are a huge hit! They are one of my favorite kids friendly meals or snacks for a Halloween party or even as fun treats for a birthday party. The sweetness and fun shape are always a winner.
I truly hope this recipe brings as much fun and ease to your hosting as it has to mine. It’s the perfect way to add a special, homemade touch to any celebration without any of the stress.
I’d love to hear how your spooky party went! Did your guests gasp when they saw these? Leave a comment and a rating below to let me know!