
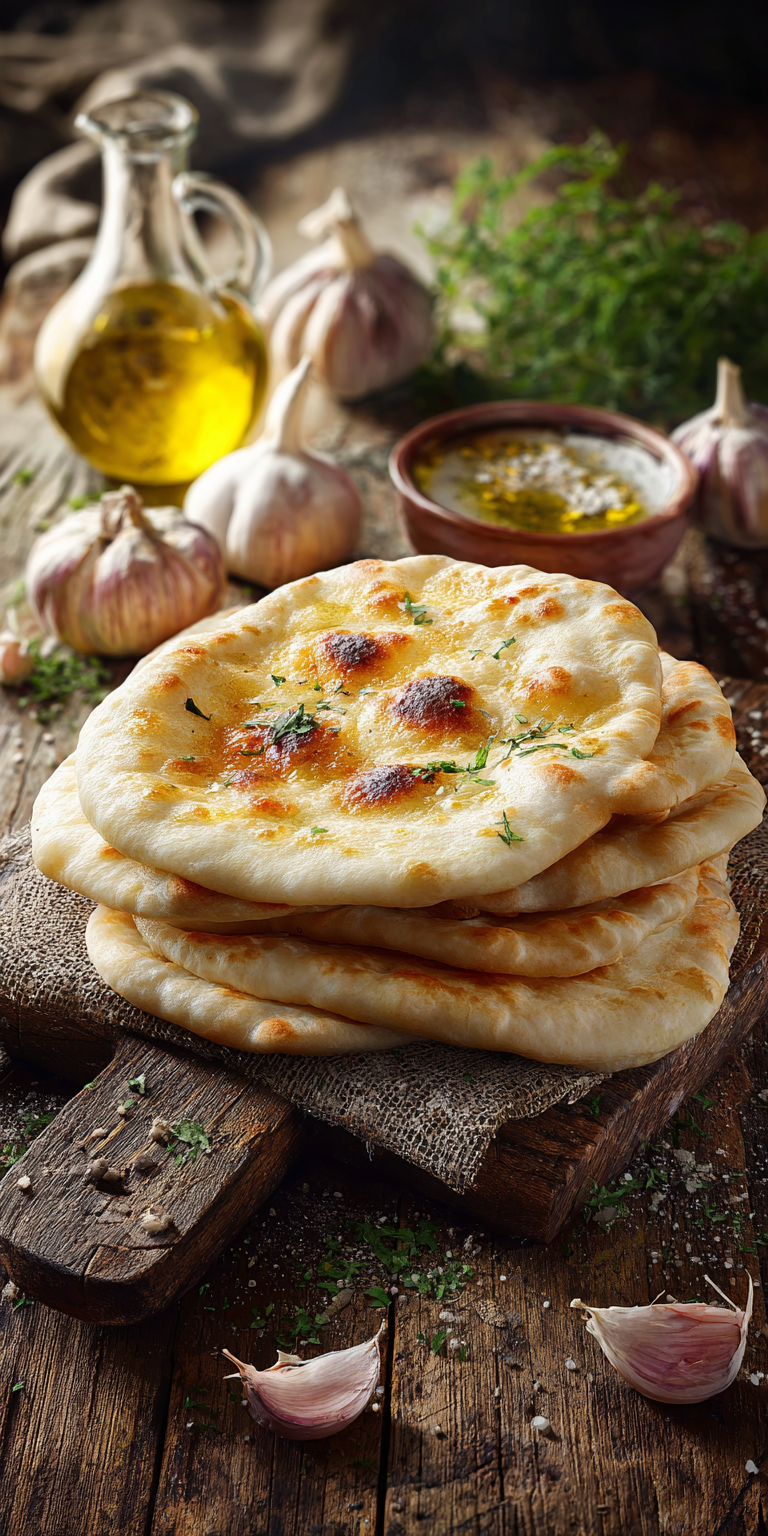
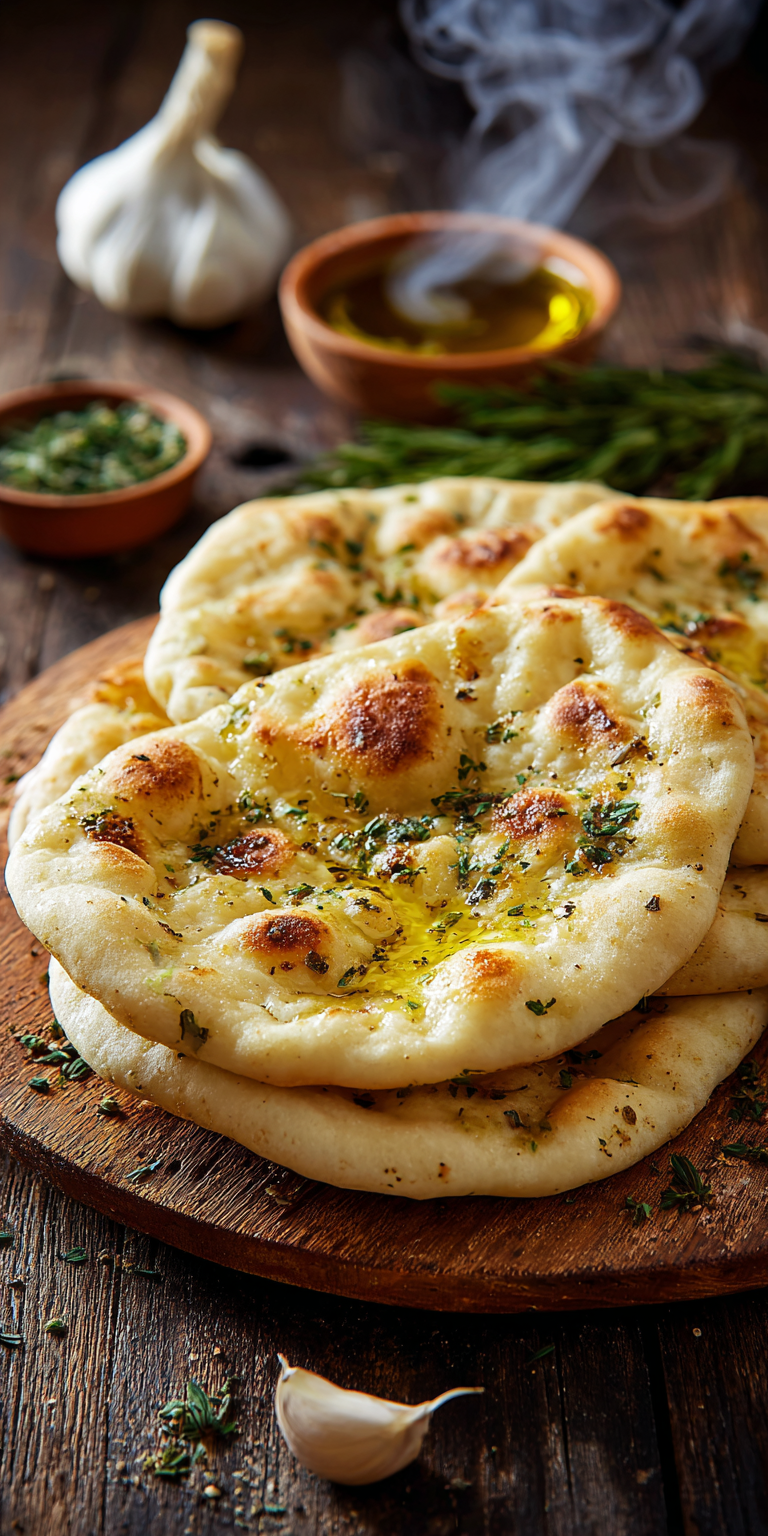
There’s something truly magical about baking your own bread, and when it comes to Easy Garlic Pita Bread from Scratch, the experience is both rewarding and delicious.
This recipe brings the warmth of freshly baked pita straight to your kitchen, infused with the irresistible aroma of garlic that fills the air as it bakes.
Whether you’re a seasoned baker or just dipping your toes into the world of homemade bread, this recipe is designed to be approachable, requiring minimal ingredients and equipment.
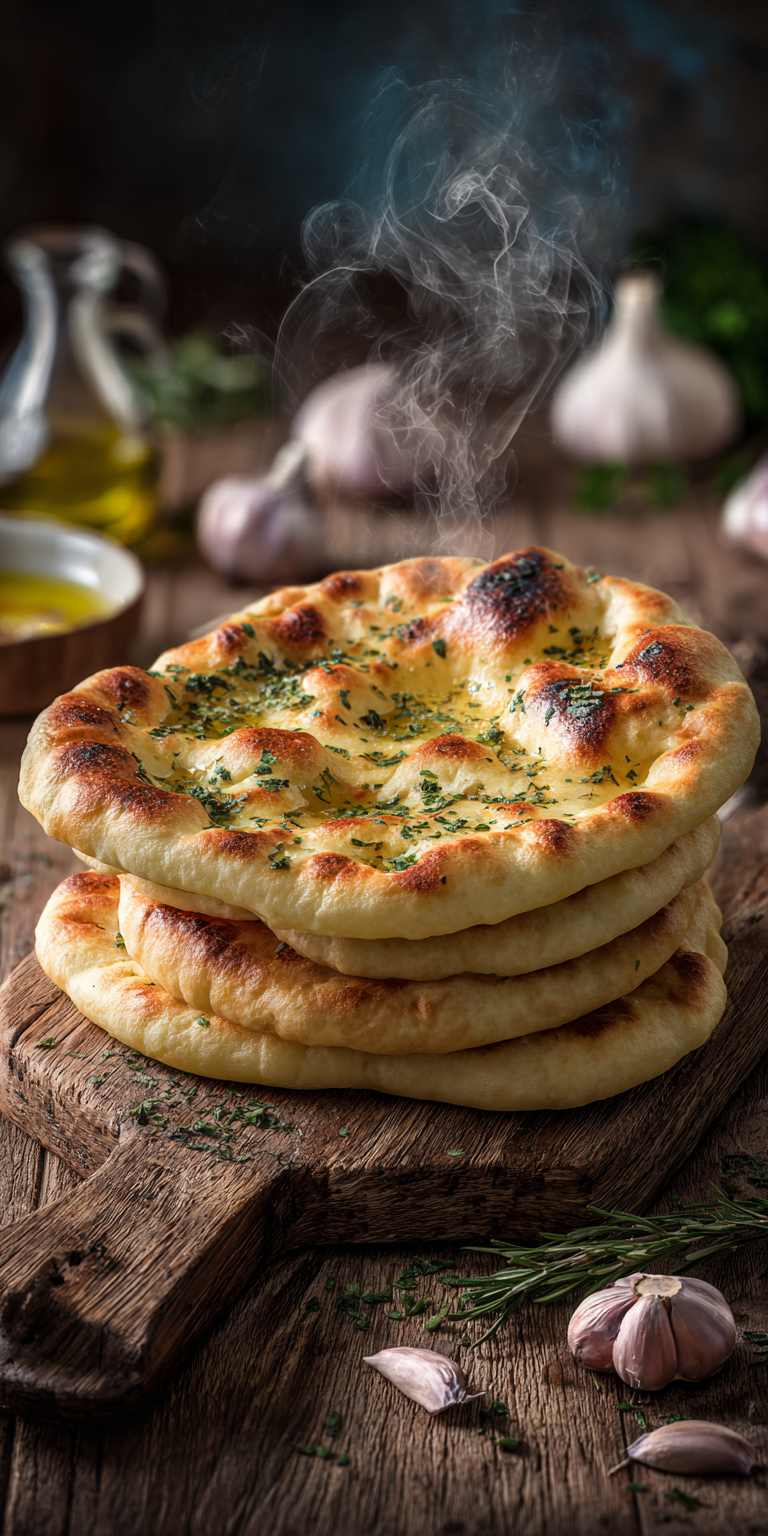
Imagine tearing into a soft, warm pita with a subtle garlic kick, perfect for dipping into hummus, wrapping around grilled meats, or simply enjoying on its own. The beauty of making pita bread at home lies in its versatility and the satisfaction of creating something so fundamental from scratch. Plus, with this easy method, you don’t need a fancy oven or years of baking experience to achieve bakery-quality results.
In this guide, I’ll walk you through every step to ensure your pita turns out fluffy and flavorful every time. From mixing the dough to achieving that signature pocket, let’s dive into the art of crafting homemade garlic pita bread that will impress your family and friends.
Recipe Overview
Here’s a quick snapshot of what to expect when making this Easy Garlic Pita Bread from Scratch:
- Cuisine: Middle Eastern-inspired
- Category: Bread, Side Dish
- Prep Time: 1 hour 30 minutes (including rising time)
- Cook Time: 10 minutes
- Total Time: 1 hour 40 minutes
- Servings: 6 medium pitas
What You’ll Need
To create this Easy Garlic Pita Bread from Scratch, each ingredient plays a vital role in achieving the perfect texture and flavor. Here’s a breakdown of their purpose:
- Flour: The foundation of the bread, providing structure and chew. All-purpose flour works best for a soft yet sturdy pita.
- Yeast: This is what makes the dough rise, creating air pockets for that fluffy interior.
- Water: Activates the yeast and brings the dough together; lukewarm water is key for optimal yeast activity.
- Salt: Enhances flavor and strengthens the dough structure.
- Olive Oil: Adds a subtle richness and helps keep the bread tender.
- Garlic: The star of the show, infusing the pita with a savory, aromatic depth whether minced into the dough or brushed on top.
INGREDIENTS
- – 2 1/4 teaspoons active dry yeast (1 standard packet)
- – 1 1/4 cups lukewarm water (about 110°F)
- – 3 cups all-purpose flour, plus extra for dusting
- – 1 teaspoon salt
- – 1 tablespoon olive oil, plus more for brushing
- – 2-3 cloves garlic, finely minced (or 1 teaspoon garlic powder for a milder flavor)
PREPARATION
- In a large mixing bowl, combine the yeast and lukewarm water. Stir gently and let it sit for about 5 minutes until the mixture becomes frothy, indicating the yeast is active.
- Add the flour, salt, olive oil, and minced garlic (or garlic powder) to the yeast mixture. Mix with a wooden spoon or your hands until a shaggy dough forms.
- Turn the dough out onto a lightly floured surface and knead for about 5-7 minutes until it becomes smooth and elastic. If the dough is too sticky, add a little more flour, one tablespoon at a time.
- Place the dough in a lightly oiled bowl, cover with a clean kitchen towel, and let it rise in a warm place for about 1 hour, or until it has doubled in size.
- After rising, punch down the dough to release air bubbles, then divide it into 6 equal portions. Roll each portion into a ball and cover with the towel to rest for 10 minutes.
- Preheat a cast-iron skillet or baking stone in the oven at 500°F for at least 30 minutes to ensure it’s very hot. Alternatively, use a stovetop skillet over medium-high heat.
- On a floured surface, roll out each dough ball into a flat circle, about 1/4 inch thick. Work with one or two pieces at a time to prevent drying out.
- Carefully place the rolled dough onto the hot skillet or stone. Bake or cook for 2-3 minutes on one side until it puffs up, then flip and cook for another 1-2 minutes until lightly golden. Brush with a little olive oil if desired.
- Remove from heat and wrap the cooked pitas in a clean towel to keep them soft. Repeat with the remaining dough.
NUTRITION INFORMATION
Per serving (1 pita, based on 6 servings):
- Calories: 180
- Total Fat: 2g
- Saturated Fat: 0g
- Carbohydrates: 35g
- Fiber: 1g
- Protein: 5g
- Sodium: 390mg
Note: Nutritional values are approximate and may vary based on specific ingredients used.
Easy Garlic Pita Bread from Scratch Recipe

What You’ll Need
INGREDIENTS
PREPARATION
Notes
Enjoy your homemade Easy Garlic Pita Bread from Scratch Recipe!
Nutrition Information
Why Garlic Makes This Pita Special
Garlic transforms a simple pita into a flavorful standout. Whether you mix minced garlic into the dough for a subtle infusion or brush a garlic-olive oil blend on after baking for a bolder punch, this ingredient elevates the bread to pair perfectly with dips, soups, or grilled dishes. Fresh garlic offers a robust taste, while garlic powder provides a milder, more evenly distributed flavor.
Tips for Achieving the Perfect Pita Pocket
The hallmark of pita bread is its pocket, which forms when steam builds up during high-heat cooking. To ensure this happens, make sure your cooking surface is preheated to a very high temperature (500°F or higher in the oven). Avoid rolling the dough too thin, as it needs enough thickness to trap steam. Finally, don’t press down on the pita while cooking—let it puff naturally.
Stovetop vs. Oven Baking Methods
You can cook Easy Garlic Pita Bread from Scratch using either a stovetop skillet or an oven with a baking stone. The stovetop method is quicker and ideal for small batches—just use a heavy skillet over medium-high heat. The oven method, with a preheated stone, mimics a traditional bread oven and often results in more consistent puffing. Both work wonderfully; choose based on your kitchen setup.
Storing and Reheating for Freshness
To keep your pita soft, store it in an airtight container or plastic bag at room temperature for up to 2 days. For longer storage, freeze the pitas in a freezer-safe bag for up to 1 month. Reheat in a 350°F oven for 5 minutes or on a skillet for a quick refresh, adding a sprinkle of water if they’ve dried out.
Customizing Your Garlic Pita
This recipe is a canvas for creativity. Add herbs like rosemary or thyme to the dough for an aromatic twist, or sprinkle sesame seeds on top before baking for texture. For a richer garlic experience, mix roasted garlic into the dough instead of raw. You can even experiment with whole wheat flour for a nuttier flavor, adjusting water as needed for the denser dough.
Serving Suggestions for Every Meal
This Easy Garlic Pita Bread from Scratch shines in countless ways. Serve it warm with homemade hummus or tzatziki for a classic appetizer. Use it as a base for quick flatbread pizzas, or stuff it with falafel, grilled veggies, or gyro meat for a hearty sandwich. It’s also a fantastic side for soups and stews, soaking up every last drop of flavor.
FREQUENTLY ASKED QUESTIONS
Can I make the dough ahead of time?
Yes, you can prepare the dough for Easy Garlic Pita Bread from Scratch in advance. After kneading, place it in an oiled bowl, cover tightly, and refrigerate for up to 24 hours. When ready to use, let it come to room temperature for about 30 minutes before dividing and rolling. This slow fermentation can even enhance the flavor of the bread.
Why didn’t my pita bread puff up?
If your pita doesn’t form a pocket, it could be due to insufficient heat or overly thin dough. Ensure your skillet or oven is preheated to at least 500°F to create the steam needed for puffing. Also, roll the dough to about 1/4 inch thick—too thin, and it won’t hold the steam; too thick, and it may not cook evenly.
Can I use whole wheat flour instead of all-purpose?
Absolutely! You can substitute up to half of the all-purpose flour with whole wheat flour for a heartier texture. Keep in mind that whole wheat absorbs more liquid, so you may need to add an extra 1-2 tablespoons of water to the dough. Knead as usual, and expect a slightly denser, nuttier result.
How do I prevent the pita from drying out?
To keep your pita soft, wrap it in a clean kitchen towel immediately after cooking to trap steam. Once cooled, store in an airtight container at room temperature. Avoid exposing it to air for too long, as this can cause it to harden. If it does dry out, lightly dampen with water and reheat briefly in a warm oven.
Conclusion
Making Easy Garlic Pita Bread from Scratch is a delightful journey into the world of homemade baking that yields incredible results with minimal effort. The soft, fluffy texture combined with the savory hint of garlic makes this bread a versatile addition to any meal, from casual snacks to elaborate dinners. With just a few pantry staples and a hot skillet or oven, you can create a batch of pitas that rival any store-bought version.
So why not give this recipe a try and elevate your next meal with the warmth of freshly baked bread? I’d love to hear how it turns out for you or any creative twists you add—feel free to share your experience in the comments below. Happy baking!
