GUYS! I’ve been waiting to share this crustless pumpkin pie recipe for YEARS. This pumpkin pie no crust recipe has completely revolutionized how my family thinks about Thanksgiving desserts, and I know it’s going to do the same for yours!
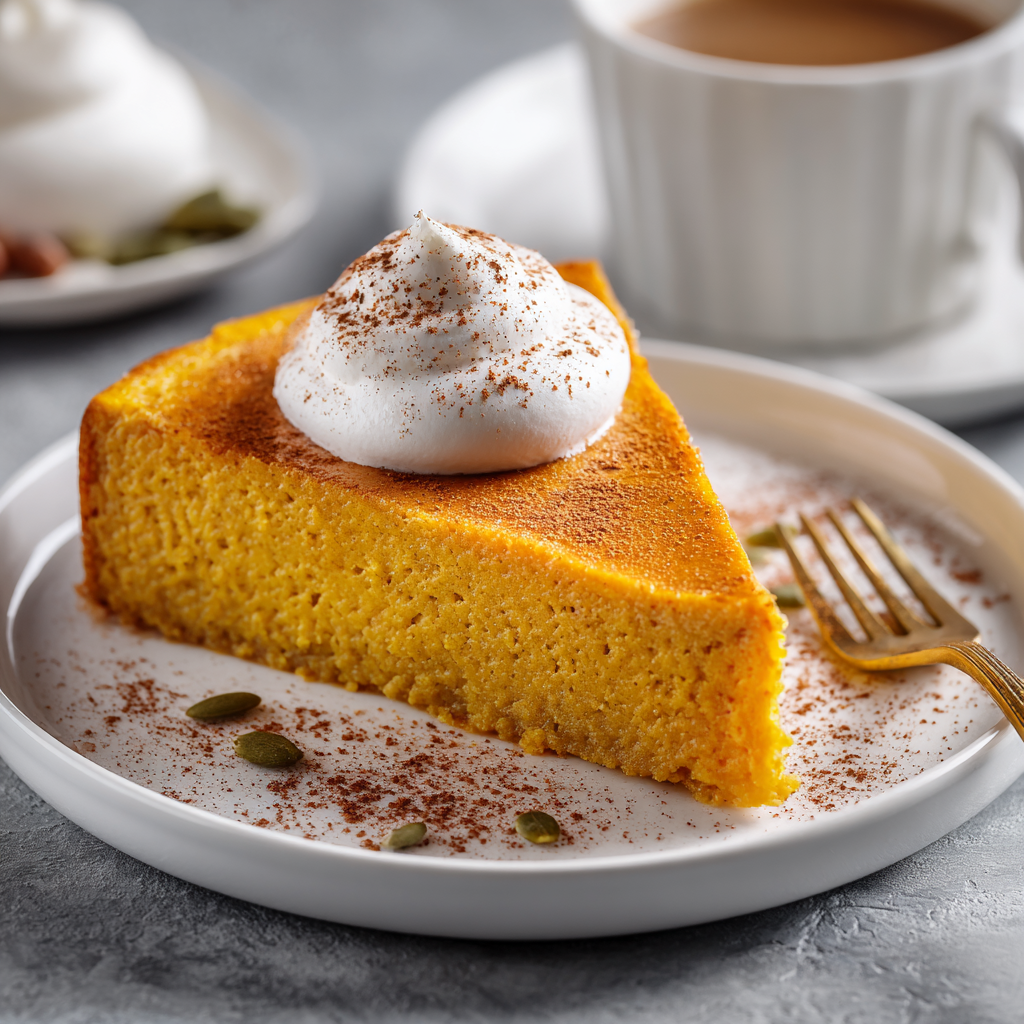
This isn’t just another crust less pumpkin pie – this is the answer to everyone who’s ever wanted all the creamy, spiced goodness of traditional pumpkin pie without the fuss (or calories!) of making a crust. It’s become our go-to for healthy desserts for thanksgiving because it delivers all the flavor with a fraction of the work.
Cuisine: American
Category: Dessert
Prep Time: 10 minutes
Cook Time: 45 minutes
Total Time: 55 minutes
Serves: 8 slices
My sister introduced me to the concept of crustless pumpkin desserts about three years ago when she was trying to figure out what to do with pie pumpkins from her garden. She suggested we skip the crust entirely and just focus on making the most incredible pumpkin custard filling. I was skeptical at first – I mean, isn’t the crust part of what makes it “pie”?
But oh my goodness, was I wrong! This crustless pumpkin pie is absolutely divine. It’s like eating the very best part of pumpkin pie – that silky, spiced custard – without any of the potential pitfalls of pastry-making. Plus, it naturally becomes one of those amazing 3 ingredient pumpkin desserts if you use a pre-made spice blend!
Why This Recipe Is Life-Changing
Have you ever made a traditional pumpkin pie only to have the crust get soggy, or spent hours making pastry from scratch? This pumpkin pie no crust recipe eliminates all those worries while actually intensifying the pumpkin flavor. Without the crust to compete for attention, every single bite is pure, creamy pumpkin perfection.
The texture is absolutely incredible – it’s like a cross between pumpkin pie and pumpkin flan. It’s firm enough to slice cleanly but so creamy and smooth that it practically melts in your mouth. My friend Sarah, who always says she’s “not much of a pumpkin person,” told me this was the first pumpkin dessert she’d ever actually craved.

It’s also ridiculously simple to make. We’re talking 3 ingredient pumpkin desserts territory here if you use pre-made pumpkin pie spice. Even if you make your own spice blend, it’s still incredibly straightforward – just mix everything together and bake. No rolling out dough, no blind baking, no worrying about whether your crust will turn out.
INGREDIENTS
Basic Crustless Pumpkin Pie:
- 1 (15 oz) can pure pumpkin puree
- 1 (12 oz) can evaporated milk
- 3 large eggs
- ½ cup granulated sugar
- 1 teaspoon vanilla extract
- 1½ teaspoons pumpkin pie spice
- ½ teaspoon salt
Sugar-Free Version (Sugarfree Pumpkin Pie Recipe):
- 1 (15 oz) can pure pumpkin puree
- 1 (12 oz) can evaporated milk
- 3 large eggs
- ⅔ cup erythritol or stevia blend
- 1 teaspoon vanilla extract
- 1½ teaspoons pumpkin pie spice
- ½ teaspoon salt
Optional Toppings:
- Whipped cream or coconut whipped cream
- Chopped pecans or toasted pumpkin seeds
- Cinnamon for dusting
- Caramel sauce (sugar-free if desired)
PREPARATION
- Preheat and prepare: Heat your oven to 350°F and generously butter or spray a 9-inch pie dish. This crustless pumpkin creation needs a well-greased dish to prevent sticking since there’s no crust to line the pan.
- Mix the base: In a large bowl, whisk together the pumpkin puree, evaporated milk, and eggs until completely smooth. Make sure there are no lumps – this is key for the silky texture that makes this pumpkin pie no crust recipe so special.
- Add sweetener and spices: Whisk in your choice of sweetener (regular sugar or sugar-free alternative for sugarfree pumpkin pie recipe), vanilla extract, pumpkin pie spice, and salt. Beat until everything is perfectly combined and the mixture is smooth and uniform.
- Pour and smooth: Transfer the mixture to your prepared pie dish and gently tap the dish on the counter to release any air bubbles. Smooth the top with a spatula for an even surface.
- Bake to perfection: Place in the preheated oven and bake for 40-45 minutes, or until the center is almost set but still has a slight jiggle when you gently shake the dish. The edges should be firm and lightly golden.
- Cool completely: Let the pie cool on a wire rack for at least 2 hours before serving. This cooling time is crucial – it allows the custard to fully set and develop that perfect sliceable texture.
- Chill and serve: For the best texture and flavor, refrigerate for at least 4 hours or overnight before serving. Serve chilled with your favorite toppings for the ultimate healthy desserts for thanksgiving experience.

Recipe Success Tips
The secret to perfect crustless pumpkin pie lies in not overbaking. You want the center to still have a very slight jiggle when you remove it from the oven – it will continue to set as it cools. Overbaking will result in a grainy texture instead of that silky smooth custard we’re after.
Make sure all your ingredients are at room temperature before mixing. Cold eggs and milk can create lumps in your batter, and we want this crust less pumpkin pie to be perfectly smooth. If you forget to take them out ahead of time, you can quickly warm the eggs by placing them in a bowl of warm water for 5 minutes.
What to do with pie pumpkins: If you’re using fresh pumpkin instead of canned, make sure to roast and puree it until completely smooth, then drain any excess liquid. Fresh pumpkin can be more watery than canned, which might affect the setting of your custard.
NUTRITION INFORMATION
Regular Version:
- 185 calories per slice
- 6g protein per slice
- 22g carbs per slice
- 8g fat per slice
- 3g fiber per slice
Sugar-Free Version:
- 145 calories per slice
- 6g protein per slice
- 12g carbs per slice
- 8g fat per slice
- 3g fiber per slice
Both versions provide excellent nutrition for healthy desserts for thanksgiving, with plenty of vitamin A from the pumpkin and protein from the eggs and milk.
Storage and Make-Ahead Tips
This crustless pumpkin pie is actually better the next day! The flavors have time to meld together, and the texture becomes even more perfectly set. Store covered in the refrigerator for up to 5 days.
Make-ahead strategy: You can prepare this up to 3 days before serving, making it perfect for Thanksgiving meal prep. Just cover with plastic wrap once completely cooled and refrigerate until ready to serve.
Freezing: This pumpkin pie no crust recipe freezes beautifully for up to 2 months. Thaw overnight in the refrigerator before serving. The texture might be slightly softer after freezing, but it’s still delicious.
Creative Variations
Individual portions: Divide the mixture among 6-8 ramekins and bake for 25-30 minutes for cute individual servings. Perfect for portion control and presentation!
Crustless pumpkin pie bars: Pour the mixture into a greased 9×13 inch baking dish and bake for 35-40 minutes. Cut into squares for easy serving at large gatherings.
Spice variations: Try adding ½ teaspoon of cardamom or ¼ teaspoon of ground ginger for unique flavor twists. You can also add 2 tablespoons of bourbon or rum extract for an adult version.
Mix-ins: Fold in ¼ cup of mini chocolate chips or chopped pecans before baking for added texture and flavor.
Perfect for Special Diets
This crustless pumpkin recipe is naturally gluten-free, making it perfect for guests with celiac disease or gluten sensitivity. The sugarfree pumpkin pie recipe version is ideal for diabetics or anyone watching their sugar intake.
For pumpkin no sugar recipes that still taste indulgent, the natural sweetness of pumpkin combined with warm spices creates a dessert that doesn’t taste “diet” at all. Even sugar-lovers won’t miss the extra sweetness.
Dairy-free option: Substitute coconut milk for the evaporated milk to make this suitable for lactose-intolerant guests. The texture will be slightly different but equally delicious.
Why This Has Become Our Thanksgiving Tradition
After years of making traditional pumpkin pie, this crustless pumpkin pie has become our family’s new standard. There’s something so liberating about skipping the crust-making process entirely and just focusing on creating the most incredible pumpkin custard possible.
It’s also incredibly forgiving – there’s no risk of a soggy bottom, no pastry disasters, and no need for special equipment or techniques. Anyone can make this successfully, which makes it perfect for novice bakers or busy holidays when you want impressive results without the stress.
The fact that it’s one of the best healthy desserts for thanksgiving options is just a bonus. You get all the comfort and tradition of pumpkin pie with better nutrition and easier preparation. It’s a win-win situation!
Serving Suggestions
This crust less pumpkin pie is absolutely divine on its own, but there are so many ways to dress it up:
Classic: A dollop of freshly whipped cream and a sprinkle of cinnamon Elegant: Drizzle with caramel sauce and top with toasted pecans Rustic: Serve with a scoop of vanilla ice cream and crushed gingersnap cookies Healthy: Top with Greek yogurt sweetened with maple syrup and a sprinkle of pumpkin seeds
FREQUENTLY ASKED QUESTIONS
Can I use fresh pumpkin instead of canned for this crustless pumpkin pie?
Absolutely! If you’re wondering what to do with pie pumpkins, this is a perfect use. Roast your pumpkin until tender, puree until smooth, then drain any excess liquid. You’ll need about 1¾ cups of puree to equal one 15-oz can.
Why doesn’t my crustless pumpkin pie set properly?
This usually happens when the pie is underbaked or the ingredients weren’t measured correctly. Make sure to bake until the center has just a slight jiggle, and always use the exact amounts specified. Overbaking can cause cracking, while underbaking prevents proper setting.
Can I make this as a sugarfree pumpkin pie recipe for diabetics?
Yes! The sugar-free version using erythritol or stevia works beautifully and tastes just as delicious. Start with the amount specified and adjust to taste, as different sugar substitutes have varying levels of sweetness.
How do I prevent my crustless pumpkin pie from cracking?
Avoid overbaking and don’t open the oven door during baking. The pie is done when the center still jiggles slightly. Also, let it cool gradually at room temperature before refrigerating to prevent temperature shock.
Can I turn this into crustless pumpkin pie bars for a crowd?
Definitely! Use a 9×13 inch pan and reduce the baking time to 35-40 minutes. This makes it easier to serve large groups and creates perfect portion-controlled squares that are ideal for healthy desserts for thanksgiving buffets.
The Ultimate Holiday Dessert
This crustless pumpkin pie has brought so much joy and simplicity to our holiday celebrations. Every time I make it, I’m reminded that sometimes the best recipes are the ones that take something beloved and make it even better by removing the complicated parts.
Whether you’re looking for 3 ingredient pumpkin desserts for busy weeknights or impressive healthy desserts for thanksgiving that won’t derail anyone’s goals, this recipe delivers every single time. The combination of simplicity, incredible flavor, and beautiful presentation makes it perfect for both casual family dinners and elegant holiday gatherings.
I hope this pumpkin pie no crust recipe becomes as beloved in your kitchen as it has in mine. There’s something magical about a dessert that tastes completely indulgent while actually being good for you – and this crustless pumpkin creation delivers that magic in every single bite!
Share Your Crustless Success!
I absolutely love seeing how this crustless pumpkin pie turns out in your kitchen! Share your photos on my Facebook page – I love seeing your beautiful results and any creative toppings you add.
Tag me @OlyviaBestRecipes on Pinterest when you make this crust less pumpkin pie! Your feedback helps other bakers discover amazing pumpkin no sugar recipes and healthy desserts for thanksgiving that actually taste incredible.
Follow me on Facebook for more incredible sugarfree pumpkin pie recipe options and holiday treats that make celebrating both delicious and nutritious!
Author: Olyvia T.