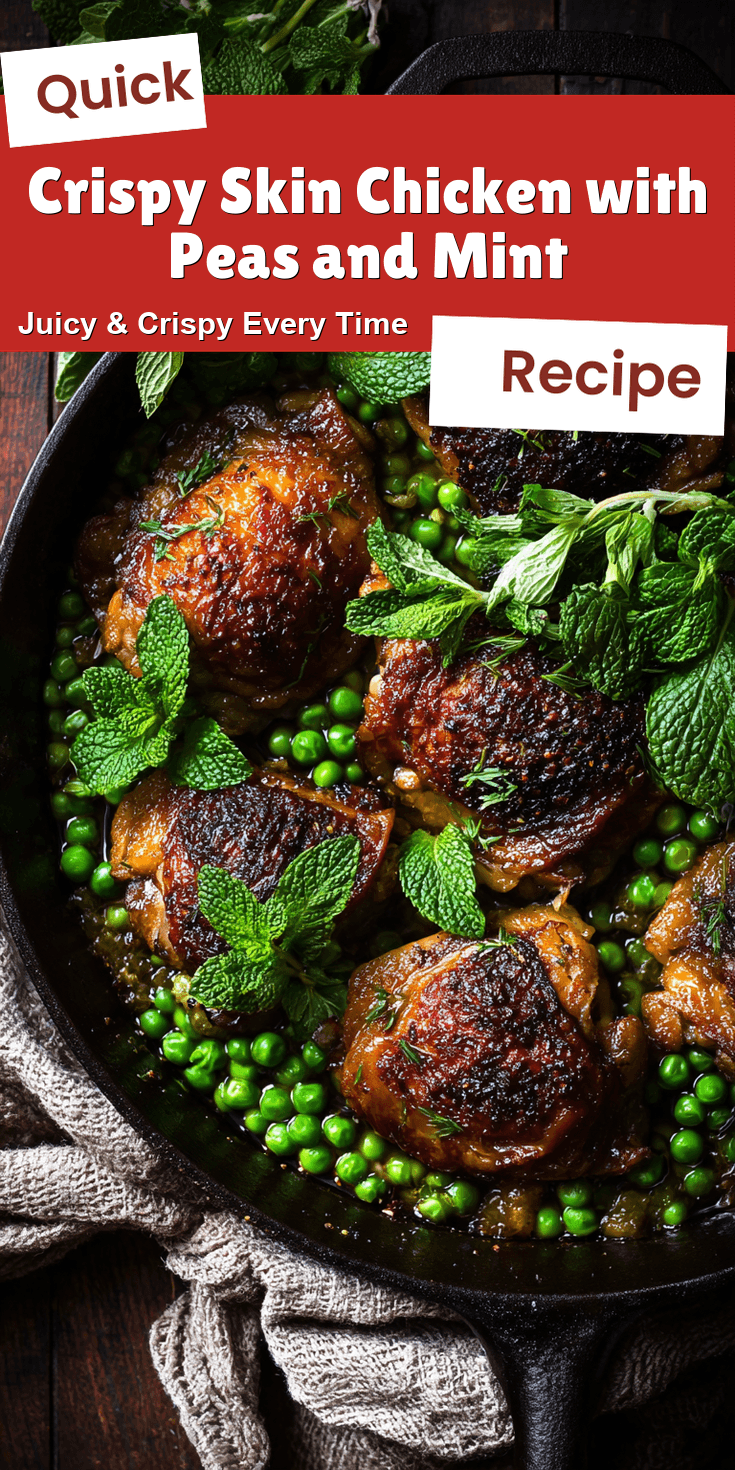
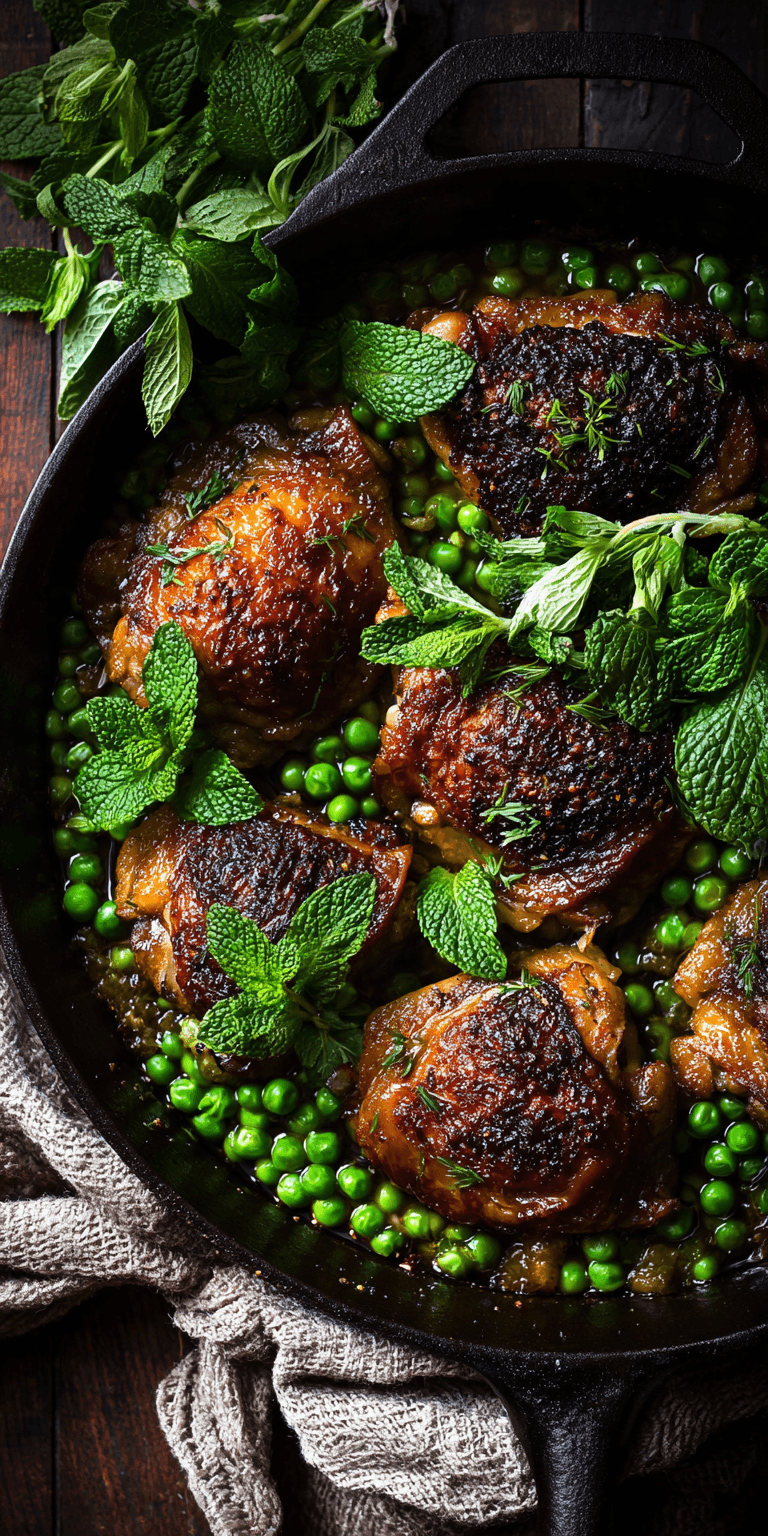
I published this recipe for Crispy Skin Chicken with Peas and Mint a few years ago after a particularly triumphant spring dinner. I had friends coming over, and I wanted something that felt special but wouldn’t keep me in the kitchen all night. It’s a fantastic one-pan meal, much like my easy crockpot chicken, potatoes, and green beans, but with a brighter, springtime twist.
My secret weapon? A trusty cast iron skillet. As a self-taught baker, I know a thing or two about how heat works, and nothing, I mean nothing, gives you that perfect, shatteringly crisp chicken skin like a heavy piece of cast iron. It’s my not-so-secret secret for turning a simple chicken dinner into something you’ll dream about.
This dish is my love letter to spring. It’s bright, fresh, and feels like a celebration on a plate. The crispy chicken, the sweet peas, and that pop of mint just work together in a way that makes me so happy. I can’t wait for you to try it.
Recipe Overview
- Cuisine: American
- Category: Main Course
- Prep Time: 15 minutes
- Cook Time: 35 minutes
- Total Time: 50 minutes
- Servings: 4
Why This Recipe is So Special
It’s all about the textures and the technique. We start the chicken in a cold pan, skin-side down. This renders the fat slowly, so the skin becomes incredibly golden and crisp without burning.
Crispy Skin Chicken with Peas and Mint Recipe
The Full Ingredient List
My Step-by-Step Method
Notes
Enjoy your homemade Crispy Skin Chicken with Peas and Mint Recipe!
Then, we use that glorious chicken fat to cook our peas and shallots. They soak up all that savory flavor. Tossing in a big handful of fresh mint at the very end is the magic touch. It brightens the whole dish and makes it taste like spring. If you love creamy, comforting chicken dishes, you might also enjoy my Slow Cooker Creamy Tuscan Chicken with Spinach and Tomato for a completely different, but equally delicious, experience.
The Full Ingredient List
Gathering everything before you start is a game-changer. It makes the whole process so much smoother. Here’s what you’ll need.
- 4 bone-in, skin-on chicken thighs
- Kosher salt and freshly ground black pepper
- 1 tablespoon olive oil
- 2 large shallots, thinly sliced
- 2 cups fresh peas (or frozen, no need to thaw)
- 1/2 cup low-sodium chicken broth
- Zest and juice of 1 lemon
- 1/3 cup fresh mint leaves, roughly chopped, plus more for garnish
- Flaky sea salt, for finishing
My Step-by-Step Method
Don’t rush the skin. I know it’s tempting to move the chicken, but patience is your best friend here. Follow these steps and you’ll be a cast iron chicken pro.
- Pat the chicken thighs completely dry with paper towels. This is non-negotiable for crispy skin. Season generously on both sides with salt and pepper.
- Place your cast iron skillet on the stove. Do not turn on the heat yet. Place the chicken thighs in the cold pan, skin-side down. Now, turn the heat to medium.
- Let the chicken cook, undisturbed, for 15-18 minutes. You’ll hear it sizzle as the fat renders. The skin should be deep golden brown and crisp. Carefully flip the thighs and cook for another 5 minutes. Transfer to a plate.
- Pour off all but about 1 tablespoon of the chicken fat from the skillet. Add the olive oil and shallots. Cook for 2-3 minutes until they start to soften.
- Add the peas and chicken broth to the skillet. Scrape up any browned bits from the bottom of the pan—that’s pure flavor! Let it simmer for 3-4 minutes until the peas are tender and bright green.
- Remove the skillet from the heat. Stir in the lemon zest, lemon juice, and most of the chopped mint. Taste and add more salt or pepper if needed.
- Nestle the crispy chicken thighs back into the skillet, right into the peas. Sprinkle everything with the remaining mint and a pinch of flaky sea salt. Serve immediately right from the pan.
My Top Tips for Success
- Dry Chicken is Key: I can’t say it enough. Moisture is the enemy of crispiness. Take the extra minute to pat every inch of that skin dry.
- Use a Splatter Screen: Rendering chicken fat can get a bit splashy. A simple splatter screen keeps your stovetop clean and saves you from little burns.
- Let the Pan Do the Work: Don’t poke or move the chicken during that initial cook. Let it sear and release on its own when the skin is ready.
- Fresh Mint at the End: Add the mint off the heat so it keeps its bright color and fresh flavor. It should taste lively, not cooked.
Common Mistakes to Avoid
I’ve made these mistakes so you don’t have to! Here’s how to steer clear of the common pitfalls.
- Starting with a Hot Pan: If your pan is already hot, the skin can burn before the fat has a chance to render out properly. Starting cold is the trick.
- Crowding the Pan: Give the chicken thighs some space. If they’re touching, they’ll steam instead of sear. Use a large skillet or cook in batches.
- Overcooking the Peas: We want them tender-crisp and vibrant, not mushy and dull. A quick simmer in the broth is all they need.
NUTRITION INFORMATION
- Calories: 420
- Total Fat: 28g
- Saturated Fat: 7g
- Cholesterol: 160mg
- Sodium: 450mg
- Total Carbohydrates: 14g
- Dietary Fiber: 4g
- Sugars: 6g
- Protein: 30g
FREQUENTLY ASKED QUESTIONS
Can I use chicken breasts instead of thighs?
You can, but I really recommend thighs for this. They have more fat, which means more flavor and juiciness, and they stand up to the longer cooking time for the skin without drying out. If you use breasts, choose bone-in, skin-on and reduce the initial skin-rendering time slightly.
My peas are frozen. Do I need to adjust anything?
Not at all! Frozen peas work perfectly here. Just add them straight from the freezer. You might need to let the broth simmer for an extra minute or two to heat them through completely.
What can I use if I don’t have a cast iron skillet?
A heavy-bottomed stainless steel or oven-safe skillet is your next best bet. The key is using a pan that holds heat really well. Avoid non-stick, as it often won’t get hot enough to give you that deep, golden sear we’re after. For another recipe that delivers incredible crispiness with a different flavor profile, check out my Crispy Garlic Chicken.
Leave a Reply! (I’d Love to Hear From You!)
Did you give this cast iron method a try? I want to know all about it! Did your family go crazy for that crispy skin? Did the mint and peas make it taste like spring on your table? Tell me everything in the comments below. Your stories and questions are my favorite part of this whole blogging adventure. And if you loved it, a star rating would make my day!