You’ve made chocolate chip cookies a hundred times. But I bet you’ve never had one that made you stop and say, “What is that incredible flavor?” That’s the power of a true kitchen secret.
Today, I’m handing you the key to a next-level treat: Brown Butter Chocolate Chip Cookies. This isn’t just a recipe tweak. It’s a fundamental shift. We’re taking a French technique straight into your American cookie jar. If you love the cozy flavor of pumpkin, you must try my Brown Butter Pumpkin Chocolate Chip Cookies for a delicious seasonal twist.
Ready to move from standard to spectacular? Let me show you how a single, simple change creates a gourmet dessert with a deep, nutty flavor you can’t get any other way.
Recipe Overview
Here’s the quick look at what we’re building. Think of this as your roadmap to cookie greatness.
- Cuisine: American (with a French twist)
- Category: Dessert
- Prep Time: 25 minutes (plus 1 hour chill)
- Cook Time: 12-14 minutes per batch
- Total Time: 1 hour 40 minutes
- Servings: 18 large cookies
The Secret Ingredient That Makes All the Difference
It’s not an ingredient you add. It’s what you do to the butter. The secret is browned butter.
Most recipes start with creaming softened butter. We’re going to cook it. We’ll heat it until the milk solids toast, turning golden brown. This process, called beurre noisette, is the entire game.
It adds a complex, toasty, nutty flavor that vanilla extract alone can never provide. It’s the soul of this cookie. Once you taste it, you’ll understand why plain melted butter just won’t do.
Why This Method is Better (My Pro-Tips)
I don’t just brown the butter. I treat it as a primary flavor component. Here’s my insider approach.
First, I use an extra yolk for a chewier, richer crumb. Second, I let the brown butter cool completely before mixing. This stops it from melting the sugar and gives us control.
Brown Butter Chocolate Chip Cookies Recipe
The “Upgraded” Ingredient List
The Pro-Method (Step-by-Step)
Notes
Enjoy your homemade Brown Butter Chocolate Chip Cookies Recipe!
Nutrition Information
Most importantly, I chill the dough. This step is non-negotiable. It lets the flavors marry and prevents your cookies from spreading into sad, flat puddles. Patience here builds texture. For another fantastic cookie that uses a similar patient chilling method, explore my recipe for Pumpkin White Chocolate Chip Cookies.
The “Upgraded” Ingredient List
Every component here has a job. Use quality ingredients—they shine through.
- 1 cup (2 sticks) unsalted butter
- 1 cup packed dark brown sugar
- 1/2 cup granulated sugar
- 1 large egg + 1 extra egg yolk, at room temp
- 2 tsp pure vanilla extract
- 2 1/4 cups all-purpose flour
- 1 tsp cornstarch
- 1 tsp baking soda
- 1 tsp fine sea salt
- 2 cups high-quality semi-sweet chocolate chips or chunks
- Flaky sea salt, for finishing
The Pro-Method (Step-by-Step)
Follow these steps in order. This is where the magic happens.
- Brown the butter: Melt butter in a light-colored saucepan over medium heat. Swirl the pan often. It will foam, then crackle. Watch for golden brown specks at the bottom and a nutty aroma. Immediately pour into a heat-proof bowl to stop the cooking. Let it cool for 25 minutes.
- Mix the base: In a large bowl, whisk the cooled brown butter, brown sugar, and granulated sugar for a full minute. Add the whole egg, extra yolk, and vanilla. Whisk again until smooth and slightly paler.
- Combine dry ingredients: In a separate bowl, whisk the flour, cornstarch, baking soda, and sea salt.
- Bring it together: Add the dry ingredients to the wet. Use a spatula to fold until just a few flour streaks remain. Fold in the chocolate chips. Do not overmix.
- Chill: Cover the bowl and refrigerate the dough for at least 1 hour, or up to 72 hours for deeper flavor.
- Bake: Preheat your oven to 350°F (175°C). Line baking sheets with parchment. Scoop 3-tablespoon portions of dough, roll into balls, and place 3 inches apart. Bake for 12-14 minutes, until the edges are set but the centers look soft.
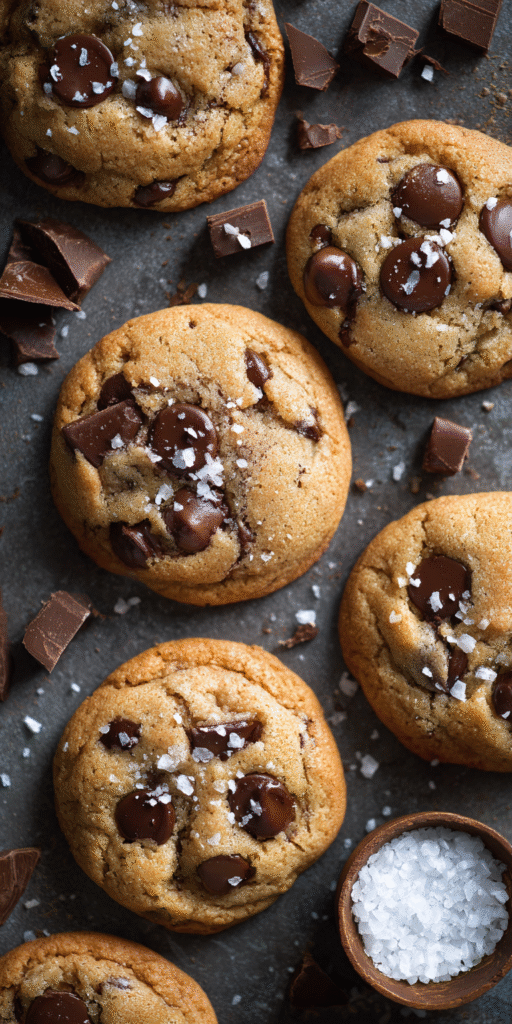
- Finish: As soon as the cookies come out, tap the pan on the counter to set the crumb. Sprinkle each with a pinch of flaky sea salt. Let cool on the sheet for 10 minutes before moving to a rack.
Common Mistakes & How to Fix Them
Even pros hit snags. Here’s how to avoid the big ones.
Problem: Cookies spread too much. Fix: Your butter was too warm, or you skipped the chill. The dough must be cold going into the oven. If your kitchen is hot, chill the scooped dough balls for 15 extra minutes.
Problem: The browned butter tastes burnt. Fix: You walked away. Use a light-colored pot so you can see the color change. The moment it smells like toasted nuts, take it off the heat. It continues to cook in the hot pan.
Variations for the Adventurous Cook
Mastered the base? Try these pro swaps to make the recipe your own.
Swap 1 cup of chocolate chips for chopped toasted walnuts or pecans. The nutty browned butter loves real nuts.
Use a mix of milk and dark chocolate chunks for a more complex sweetness. Or, add 1/2 teaspoon of espresso powder to the dry ingredients to boost the chocolate flavor without tasting like coffee.
Nutrition Notes
Let’s be real—this is a treat. But here’s the basic breakdown per cookie.
- Calories: ~280
- Fat: 16g
- Carbohydrates: 33g
- Protein: 3g
Your Pro-Level Questions Answered
These are the questions I get from bakers who want to dig deeper.
Can I brown the butter ahead of time?
Absolutely. You can brown the butter, let it cool, and store it covered in the fridge for up to a week. Just let it come back to a soft, spreadable consistency before you use it in the recipe.
Why the extra egg yolk?
The yolk adds fat and emulsifiers, which gives us a denser, richer, and chewier cookie. The white can make things cakey. We want fudgy and soft.
Is the flaky sea salt really necessary?
Yes. It’s the final contrast. That tiny crunch and burst of saltiness against the sweet, nutty cookie and bitter chocolate is a hallmark of a gourmet cookie. Don’t skip it.
A Few Final Secrets
You now have the blueprint. But the real skill is in the details. Trust your nose when browning the butter. It never lies.
And remember, the longer you chill the dough, the better the flavor. Overnight is my sweet spot. It turns a great cookie into an unforgettable one.
This method takes a classic and gives it a sophisticated, grown-up edge. It’s the difference between a simple sweet and a fancy dessert you’re proud to serve. If you’re looking for another way to enjoy these wonderful autumn flavors, my Pumpkin Zucchini Chocolate Chip Bread is a perfect, moist loaf for breakfast or a snack.
Now that you have the secret, go try it! I want to hear all about it. Did that nutty flavor change everything for you? Let me know if it’s a game-changer in the comments below!