
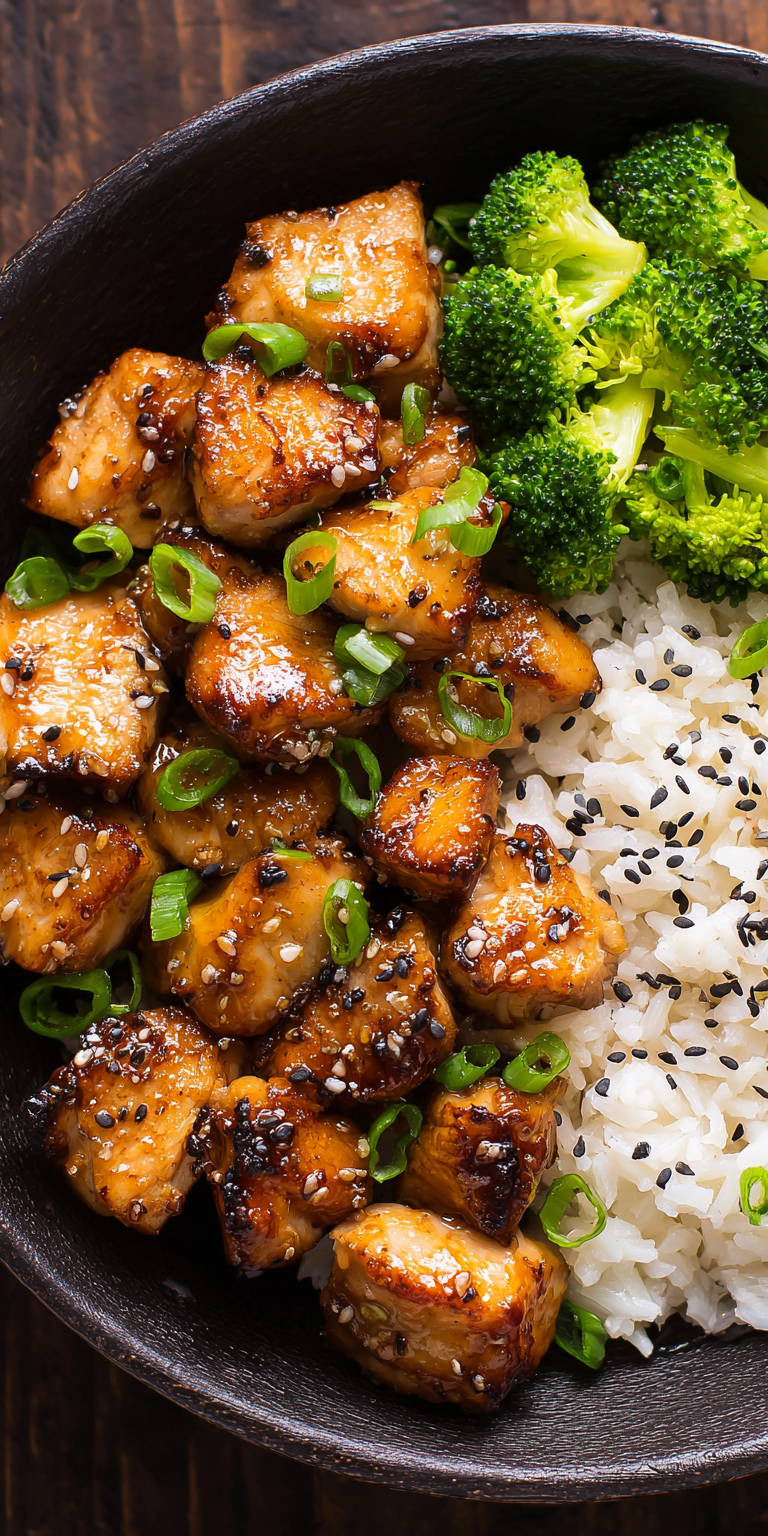
You’ve made teriyaki chicken before. You’ve got the sauce, the chicken, the rice. But your Teriyaki Chicken Rice Healthy Meal Prep is about to get a serious upgrade. If you love quick, protein-packed dinners, you should also try this high-protein garlic chicken fried rice.
I’m going to share the one secret ingredient that changes everything. It’s not in your average recipe. It’s the key to a sauce that clings, shines, and tastes like it came from your favorite takeout spot.
Ready to find out what it is? Let’s get into it.
Recipe Overview
This is your blueprint for a week of incredible lunches. It’s built for flavor and built to last.
- Cuisine: Japanese-Inspired
- Category: Healthy Meal Prep
- Prep Time: 15 minutes
- Cook Time: 25 minutes
- Total Time: 40 minutes
- Servings: 4 meal prep portions
The Secret Ingredient That Makes All the Difference
Here it is. The game-changer. It’s mirin.
Teriyaki Chicken Rice Healthy Meal Prep Recipe

The “Upgraded” Ingredient List
The Pro-Method (Step-by-Step)
Notes
Enjoy your homemade Teriyaki Chicken Rice Healthy Meal Prep Recipe!
Most recipes tell you to use sugar or honey. That’s fine. But mirin is a sweet Japanese rice wine. It adds a complex, rounded sweetness that plain sugar can’t touch.
It also gives the sauce a beautiful, glossy finish. Your sauce will coat the chicken perfectly instead of just running off. This one swap makes your homemade version taste truly authentic.
Why This Method is Better (My Pro-Tips)
I don’t just simmer the sauce. I build it in two stages. This gives you maximum control.
First, I reduce the sauce base alone until it’s syrupy. This concentrates the flavor. Then, I add it back to the chicken to glaze. This prevents the chicken from overcooking in the simmering liquid. You get juicy meat and a powerful, sticky sauce every single time.
The “Upgraded” Ingredient List
Gather these. Quality matters here, especially for the sauce.
- 1.5 lbs boneless, skinless chicken thighs, cut into 1-inch pieces
- 1 tbsp neutral oil (like avocado or canola)
- 2 cloves garlic, minced
- 1 tsp fresh ginger, grated
- 1/2 cup low-sodium soy sauce
- 1/4 cup mirin (the secret!)
- 2 tbsp sake or dry white wine (or water)
- 2 tbsp light brown sugar
- 1 tbsp rice vinegar
- 2 tsp cornstarch mixed with 1 tbsp cold water
- 4 cups cooked white or brown rice
- Steamed broccoli or snap peas, for serving
- Sesame seeds and sliced green onion, for garnish
The Pro-Method (Step-by-Step)
Follow these steps in order. This is where the magic happens.
- Pat your chicken thighs very dry with paper towels. This is crucial for a good sear. Season them lightly with a pinch of salt.
- Heat the oil in a large skillet or wok over medium-high heat. Add the chicken in a single layer. Don’t crowd the pan. Let it sear undisturbed for 3-4 minutes until golden brown on one side, then flip and cook through. Remove the chicken to a plate.
- In the same pan, lower the heat to medium. Add the garlic and ginger. Cook for just 30 seconds until fragrant. Don’t let it burn.
- Pour in the soy sauce, mirin, sake, brown sugar, and rice vinegar. Whisk it together and let it come to a simmer.
- Let this mixture simmer for 3-4 minutes. This cooks off the alcohol and starts to reduce the sauce.
- Give your cornstarch slurry a final stir and slowly drizzle it into the simmering sauce while whisking constantly. The sauce will thicken almost immediately.
- Return the cooked chicken (and any juices) to the pan. Toss and cook for 1-2 minutes until the chicken is coated in the thick, glossy sauce and heated through.
- Take the pan off the heat. Your teriyaki chicken is ready.
Common Mistakes & How to Fix Them
Even pros run into issues. Here’s how to solve them before they start.
The sauce is too thin. You didn’t reduce it enough before adding the slurry. Fix it by removing the chicken and simmering the sauce for a few more minutes. Or, mix another teaspoon of cornstarch with a tablespoon of cold water and whisk it in.
The chicken is tough. You overcooked it. Chicken thighs are forgiving, but they can still dry out. Next time, pull them from the pan the moment they’re cooked through. They’ll finish heating in the sauce later.
The sauce tastes too salty. You likely used regular soy sauce. Always use low-sodium. If it’s already too late, a tiny splash of water and a pinch more brown sugar can help balance it.
Variations for the Adventurous Cook
Mastered the base recipe? Try these pro-level swaps.
Swap the chicken for salmon fillets. Pan-sear them skin-side down until crispy, then glaze with the sauce at the very end.
For a vegetarian power move, use extra-firm tofu. Press it well, cube it, and coat in cornstarch before pan-frying until crispy. Then, toss it in the sauce.
Add a teaspoon of gochujang (Korean chili paste) to the sauce ingredients. It gives a deep, spicy kick that’s absolutely incredible.
Nutrition Notes
This is a balanced, protein-packed meal. Here’s a rough breakdown per serving (with 3/4 cup rice and broccoli).
- Calories: ~550
- Protein: 35g
- Carbohydrates: 65g
- Fat: 14g
- Using brown rice adds more fiber. Chicken thighs have more flavor and a bit more fat than breasts, but they stay juicier during reheating.
Your Pro-Level Questions Answered
You’ve got questions. I’ve got the insider answers.
Can I make the sauce ahead of time?
Absolutely. You can mix the soy sauce, mirin, sake, sugar, and vinegar and keep it in a jar in the fridge for up to a week. When ready, simmer it and add the cornstarch slurry to thicken.
What’s the best way to reheat this meal prep?
Take the lid off your meal prep container. Sprinkle a few drops of water over the rice. Heat in the microwave for 1.5 to 2 minutes, stopping to stir the chicken and sauce halfway through. This keeps everything moist.
My sauce got too thick in the fridge. Help!
No problem. Sauces always thicken when cold. When you reheat, add just a teaspoon of water to the container before microwaving. It will loosen right back up to a perfect glaze.
A Few Final Secrets
Let’s lock in those restaurant-quality results. These small touches make a big impact.
Let your cooked rice sit for 10 minutes after fluffing it. This lets excess steam escape. Your rice won’t get soggy in the fridge.
When packing your meal prep containers, follow this order: rice first, then your veggie barrier, then the teriyaki chicken on top. This keeps the rice from getting mushy. For another fantastic make-ahead lunch idea, check out these easy mason jar chicken burrito bowls.
Garnish with sesame seeds and green onion right before you eat, not when you pack. They’ll stay bright and fresh.
Now you have everything. The secret ingredient, the pro method, and the fixes for any hiccup. This is your new go-to meal prep recipe. I want to hear how it turns out for you. Did the mirin change the game? What variation did you try? Tell me all about it in the comments below!