Is the nightly dinner table a battlefield in your house too? I get it. One kid won’t touch anything green, another thinks all sauces are “suspicious,” and you’re just trying to get a decent meal on the table without a mutiny.
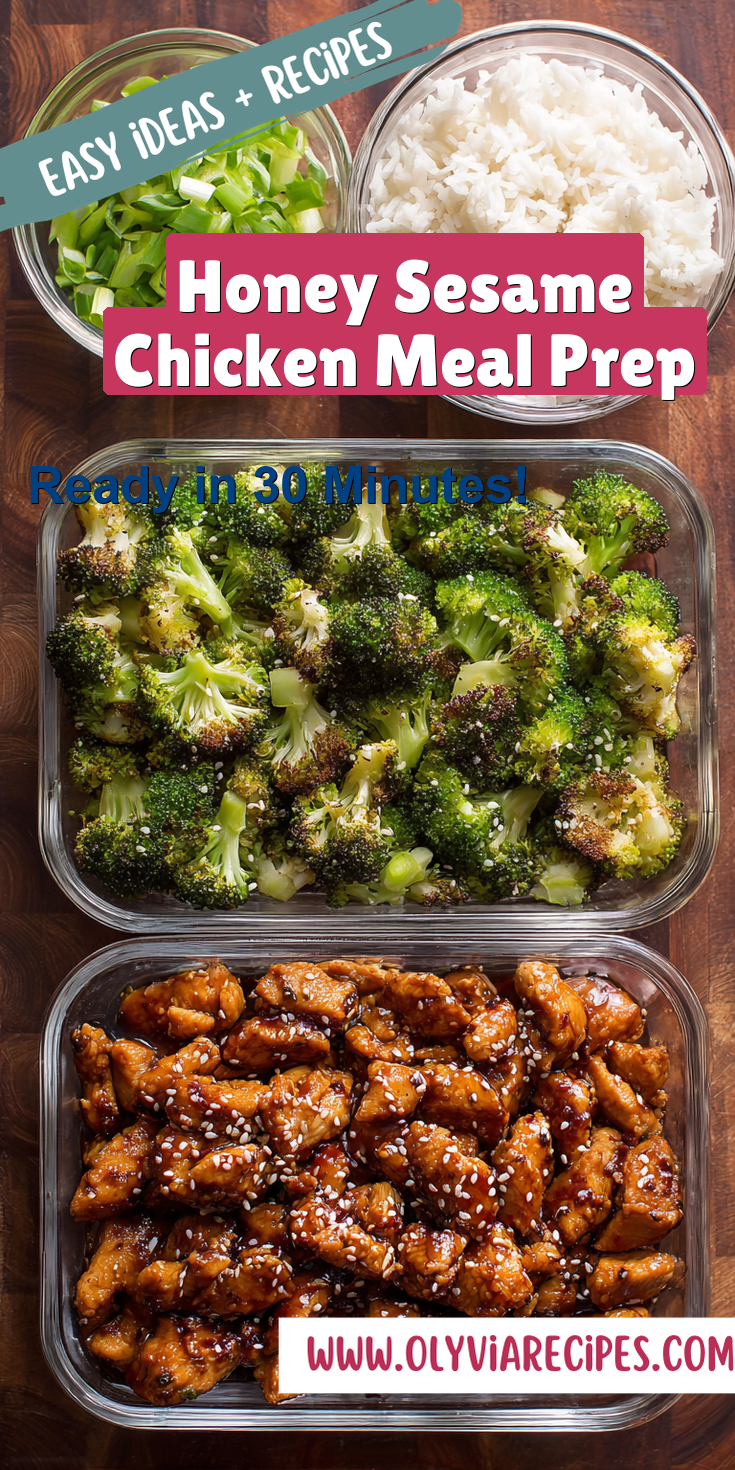
That’s why I’m so excited to share our family’s secret weapon: Honey Sesame Chicken Meal Prep. This isn’t just another recipe. It’s my go-to for a healthy lunch or a stress-free dinner that actually gets eaten, much like our popular Mason Jar Chicken Burrito Bowls. The magic is in the sweet, savory sauce and the crispy, baked chicken that even my most skeptical critic can’t resist.

Best of all, we make it all ahead of time. Imagine opening the fridge on a Wednesday to find a delicious, homemade Asian-inspired meal ready in minutes. Let’s make that dream a reality.
Recipe Overview
- Cuisine: Asian-Inspired
- Category: Meal Prep, Family Dinner
- Prep Time: 15 minutes
- Cook Time: 20 minutes
- Total Time: 35 minutes
- Servings: 4-6
Why Even My Picky Eaters Love This!
I’ve served this to some of the toughest food critics on the planet (my kids’ friends). Here’s why it wins every time.
The chicken gets nice and crispy from a quick bake, which is always more fun than soggy chicken. The honey sesame sauce is sweet first, savory second—a total kid-pleaser. We serve everything separately, so they can build their own plate. That sense of control is a game-changer for picky eaters.
Honey Sesame Chicken Meal Prep Recipe
The Full Step-by-Step Instructions
Notes
Enjoy your homemade Honey Sesame Chicken Meal Prep Recipe!
Our Family-Friendly Ingredient List
I keep things simple. You probably have most of this in your pantry right now.
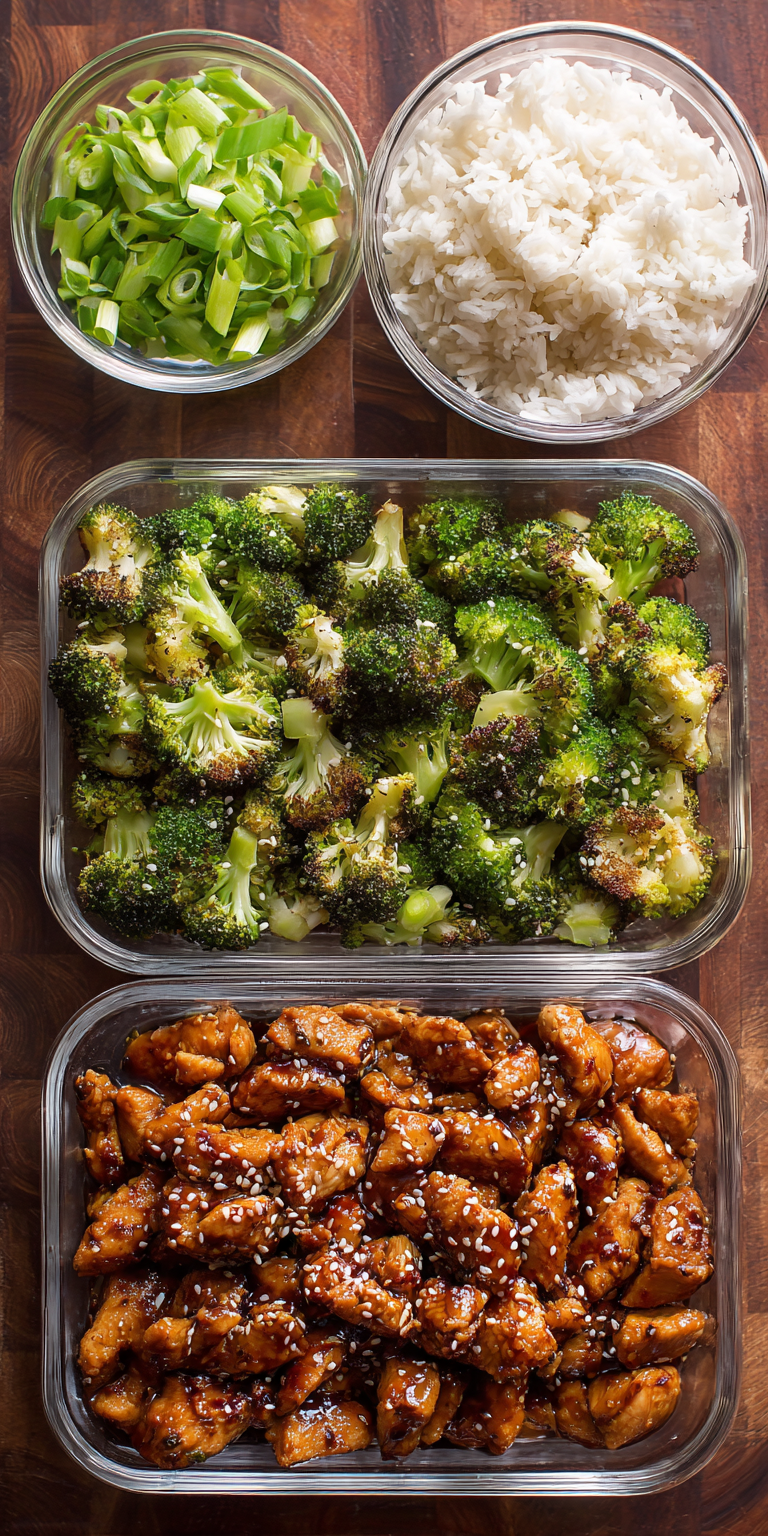
For the Chicken: Boneless, skinless chicken breasts (cut into bite-sized pieces), cornstarch, garlic powder, salt, black pepper, a couple of eggs, and cooking spray or a bit of oil.
For the Famous Sauce: Honey, soy sauce (use tamari for gluten-free), rice vinegar, minced garlic, sesame oil, and a little cornstarch mixed with water to thicken it up.
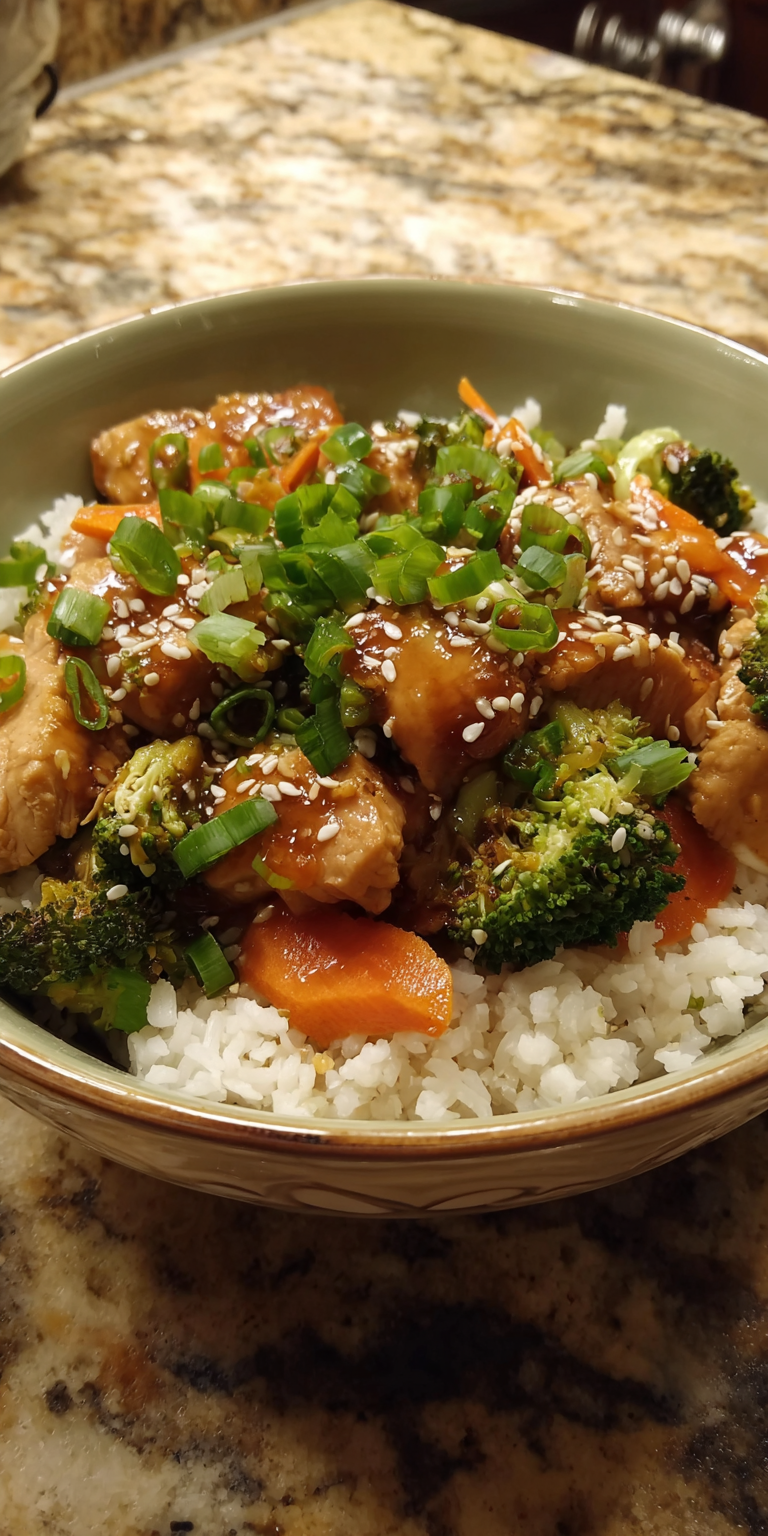
For Serving & Prep: Cooked white or brown rice, steamed broccoli florets, and toasted sesame seeds for that perfect finish.
How to Get the Kids Involved in Cooking This
Getting little hands involved makes them so much more excited to eat. Here are two safe, easy jobs.
Job 1: The Coating Station Manager. Kids love the messy fun of dredging! Set up your bowls: one with cornstarch and spices, one with beaten egg. Let them drop the chicken pieces in and coat them. It’s like a tasty science experiment.
Job 2: The Sauce Stirrer. Once the sauce ingredients are measured in a bowl, hand over a whisk. Their mission is to mix it until everything is perfectly combined. They take great pride in making “their” sauce.
The Full Step-by-Step Instructions
Don’t let the steps fool you—this comes together fast. The meal prep part is where you save your future self hours of stress. If you love make-ahead meals, you should definitely try our easy chicken burrito bowl meal prep next.
- Preheat your oven to 400°F (200°C). Line a large baking sheet with parchment paper and give it a light spray with oil.
- Cut your chicken breasts into evenly sized, bite-sized pieces. This helps them cook at the same rate.
- In one bowl, mix the cornstarch, garlic powder, salt, and pepper. In a second bowl, beat the eggs.
- Toss the chicken pieces in the cornstarch mix first. Shake off the extra. Then, dip them into the beaten egg.
- Place each coated piece on your prepared baking sheet. Give them a little space so they crisp up nicely.
- Bake for 15-20 minutes, flipping halfway through, until the chicken is golden brown and cooked through.
- While the chicken bakes, make the sauce. In a small saucepan, whisk together the honey, soy sauce, rice vinegar, and garlic. Bring it to a gentle simmer.
- In a tiny cup, mix the extra cornstarch with a tablespoon of cold water. Slowly whisk this into your simmering sauce. Cook for 1-2 minutes until it thickens. Turn off the heat and stir in the sesame oil.
- When the chicken is done, toss it right in the saucepan with the warm sauce until every piece is beautifully coated.
- Divide cooked rice, steamed broccoli, and the saucy honey sesame chicken into your meal prep containers. Sprinkle with toasted sesame seeds.
Fun Twists for Different Tastes
Every family is different. Here’s how we tweak this dish to keep everyone happy.
For the Sauce-Skeptical Kid: Serve the sauce on the side as a “dipping sauce.” Sometimes, dipping is cool while pouring is not. Kid logic!
To Boost the Veggies: Try different veggie sides each week. Sliced bell peppers, snap peas, or shredded carrots all work great and add color.
For a Spicy Grown-Up Kick: I often set aside a portion of the sauce for myself and my husband. We stir in a big spoonful of sriracha or a pinch of red pepper flakes. It’s our little secret.
Storing & Reheating (Perfect for Busy Nights)
This is the best part! Your future self will thank you for this effort.
Let the components cool completely before putting the lids on your containers. They will keep in the fridge for up to 4 days. To reheat, just pop a container in the microwave for 1.5 to 2 minutes, until hot.
The chicken stays surprisingly good! The sauce soaks into it a bit, keeping it moist. The broccoli might soften, but it’s still tasty and full of nutrients.
Nutrition Notes
I’m not a dietitian, but I’m a parent who cares about feeding my family well. Here’s the simple breakdown of what’s in this meal.
- Great source of lean protein from the chicken.
- Using tamari makes this a gluten-free recipe.
- You control the sugar by adjusting the honey.
- Broccoli adds fiber and vitamins.
- Using brown rice adds whole grains.
FREQUENTLY ASKED QUESTIONS
Can I make this with chicken thighs?
Absolutely! Chicken thighs are more forgiving and stay super juicy. Just make sure to trim any extra fat and bake them a few minutes longer until they reach a safe internal temperature.
My child has a soy allergy. What can I use instead?
No problem! Coconut aminos are a fantastic, soy-free substitute. They have a similar salty-sweet flavor that works perfectly in this sauce.
Can I freeze the meal prep containers?
You can, but with a caveat. The texture of the broccoli can become mushy after freezing and thawing. I find this recipe is best enjoyed within the 4-day fridge window for the best texture.
There you have it! Our family’s not-so-secret weapon against the “what’s for dinner” dread and the lunchbox blues. It’s a recipe that feels like a treat but is built on simple, good ingredients, perfect for anyone building a repertoire of easy meal prep wins.
When you have a meal that everyone will eat, it just makes the whole day smoother. You get a win, and they get a delicious lunch or dinner. That’s what I call a happy ending.
I’d love to know if this was a hit with your family! Did your picky eater try the broccoli? Did you add a spicy twist? Please leave a comment and rating below!