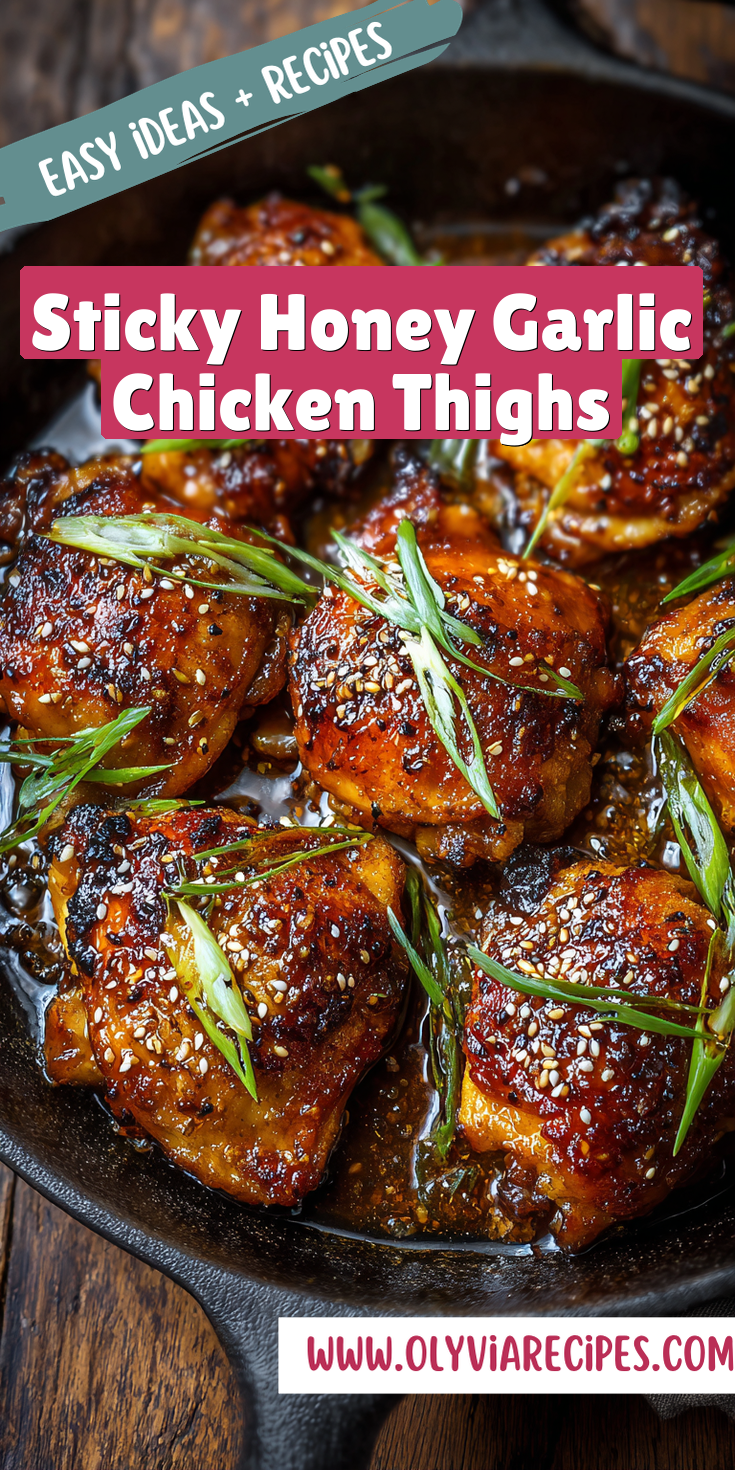
What’s better than a home-cooked meal? A home-cooked meal with only ONE pot to clean! I love food, but I have a deep, passionate hatred for the mountain of dishes that often comes with it.
If you’re nodding along, you’re my people. That’s why I’m obsessed with recipes that deliver maximum flavor with minimal cleanup. Today’s star is a total game-changer: Sticky Honey Garlic Chicken Thighs. If you love this flavor combo, you must try my Honey Garlic Lemon Pepper Chicken Thighs for another easy, one-pan winner.
It’s the perfect mix of sweet, savory, and garlicky goodness. Best of all, it all happens in a single pan. Let’s get cooking and keep that sink empty.
Recipe Overview
Here’s the quick snapshot of what we’re making. It’s as simple as it sounds.
Sticky Honey Garlic Chicken Thighs Recipe

The Full Ingredient List
My “Less Mess” Cooking Method (Step-by-Step)
Notes
Enjoy your homemade Sticky Honey Garlic Chicken Thighs Recipe!
- Cuisine: Asian-Inspired
- Category: Main Course
- Prep Time: 10 minutes
- Cook Time: 25 minutes
- Total Time: 35 minutes
- Servings: 4
The Magic of a One-Pot (or One-Pan) Meal
I live for this cooking style. Everything cooks together, which means the flavors build and mingle right in the pan.
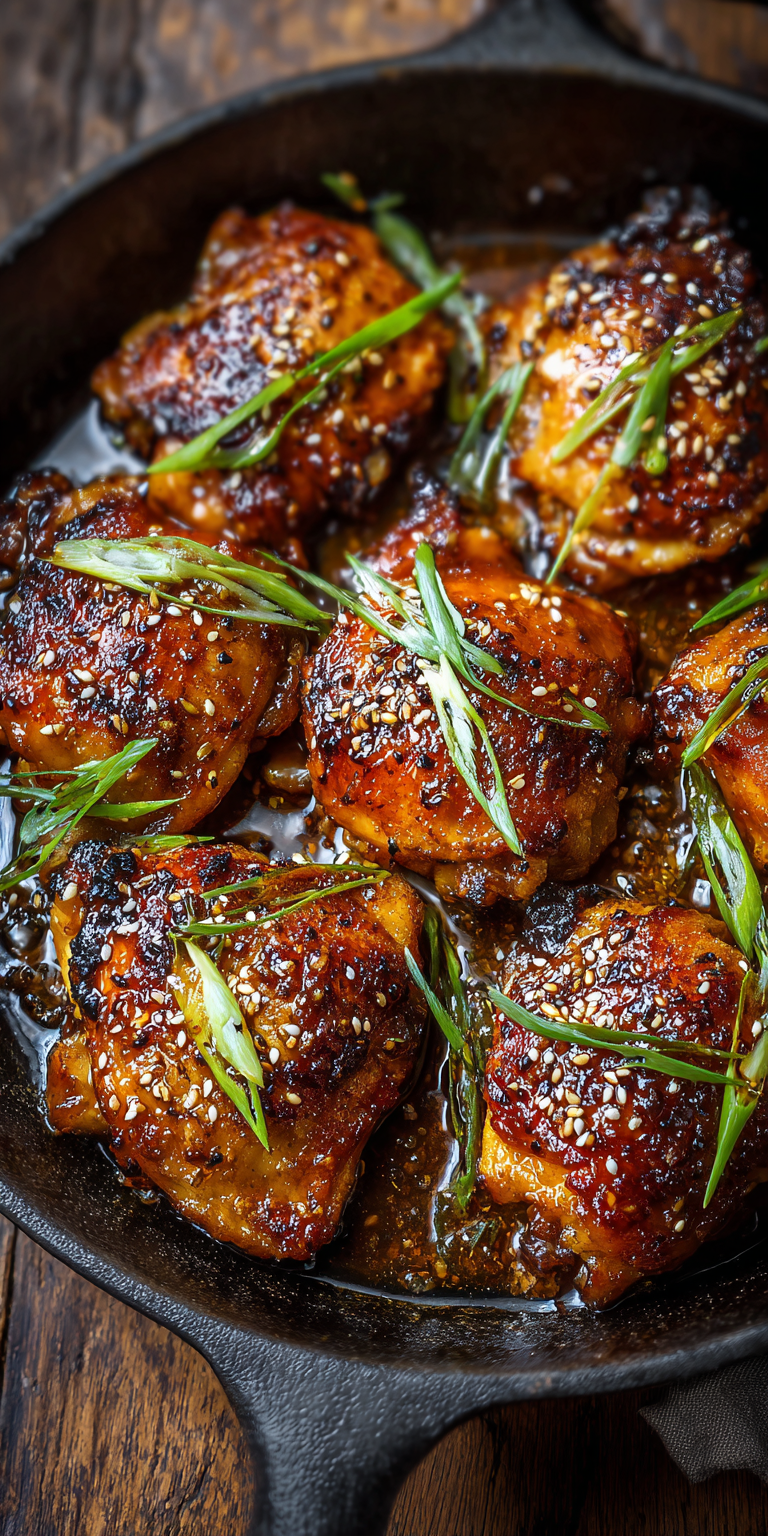
The sauce reduces and thickens while the chicken cooks. You get a restaurant-quality glaze without any extra steps or pots. It’s the ultimate efficient kitchen win.
All You Need (One Pot & These Ingredients)
Gathering your gear is half the battle. For this, you just need one large skillet or pan with high sides.
A cast iron skillet or a sturdy non-stick pan works perfectly. The ingredients are simple pantry staples that pack a huge punch.
The Full Ingredient List
Here’s everything you’ll need to make this sticky, savory dream come true.
- 1.5 to 2 lbs bone-in, skin-on chicken thighs
- Salt and black pepper
- 1 tablespoon olive oil or avocado oil
- 5-6 large garlic cloves, minced
- 1/3 cup honey
- 1/4 cup low-sodium soy sauce
- 2 tablespoons rice vinegar
- 1 tablespoon sriracha or chili garlic sauce (adjust to taste)
- 1 teaspoon grated fresh ginger
- Green onions and sesame seeds for garnish
My “Less Mess” Cooking Method (Step-by-Step)
Follow these steps closely. I’ve included my best tricks to keep the splatter and mess to an absolute minimum.
- Pat your chicken thighs completely dry with a paper towel. This is the secret to getting crispy skin and prevents messy oil splatters. Season them well with salt and pepper.
- Heat your oil in that single large skillet over medium-high heat. Once hot, add the chicken thighs skin-side down. Let them cook without moving for 6-8 minutes to get that skin golden and crisp.
- Flip the chicken and cook for another 5 minutes. Then, transfer them to a plate for a moment. Don’t worry, they’re not done yet!
- Reduce the heat to medium. In the same pan, you’ll see all those delicious browned bits. Add the minced garlic and ginger. Stir for just 30 seconds until fragrant.
- Pour in the honey, soy sauce, rice vinegar, and sriracha. Give it a good whisk, scraping up all those flavorful bits from the pan bottom. This is where the magic sauce forms.
- Return the chicken to the pan, skin-side up. Spoon some sauce over each piece. Let it simmer for 10-15 minutes, until the chicken is cooked through and the sauce is thick and sticky. For a fun, grilled twist on garlicky chicken, my Garlic Parmesan Chicken Skewers are a must-try for your next BBQ.
- That’s it! Garnish with sliced green onions and sesame seeds. Serve it right from the pan if you’re feeling extra lazy (I always am).
Pro-Tips for Perfect One-Pot Cooking
A few small habits make a huge difference in your one-pot success. These are my non-negotiables.
First, use the right size pan. If it’s too small, the chicken will steam. If it’s too big, your sauce will burn. A 10-12 inch skillet is ideal.
Don’t stir the chicken too early. Let that skin get crispy and release on its own. It gives you the best texture and prevents sticking.
Finally, let the sauce reduce naturally. A bubbling simmer is perfect. A rolling boil can make it burn. Patience gives you that perfect glossy coating.
Storing & Reheating (Easy!)
This dish makes fantastic leftovers. The flavors get even better the next day.
Let the chicken cool, then store it in an airtight container in the fridge for up to 4 days. Reheat it gently in a covered skillet with a tiny splash of water to loosen the sauce.
You can also microwave it in 30-second bursts. I love it cold on a salad for lunch, too!
Nutrition Notes
This is a general breakdown per serving. Your exact numbers will depend on the specific ingredients you use.
- Calories: ~450
- Protein: ~35g
- Fat: ~25g
- Carbohydrates: ~25g
- Sugar: ~22g
Your One-Pot Questions, Answered
I get a few common questions every time I share this recipe. Here are the quick answers.
Can I use chicken breasts instead of thighs?
You can, but I don’t recommend it for this method. Thighs stay juicy during the longer simmer. Breasts can dry out. If you must, use boneless breasts and cut the simmer time in half.
My sauce isn’t getting sticky. What did I do wrong?
This usually means the heat is too low. Make sure you’ve got a steady, gentle simmer after adding the sauce. Let it bubble and reduce without a lid. It will thicken as it cools, too.
Is there a substitute for honey?
For a similar sticky texture, you can try pure maple syrup. The flavor will be slightly different, but still delicious. I don’t recommend sugar-free syrups, as they often don’t thicken properly.
And there you have it. A ridiculously tasty meal that leaves you with a clean kitchen and a very happy stomach. It’s the kind of recipe that makes weeknights feel special without any of the usual hassle. If you’re craving another rich, buttery garlic chicken dish, my classic Lemon Garlic Butter Chicken is always a crowd-pleaser.
This sticky, savory sauce is so good you’ll want to put it on everything. I won’t judge if you lick the pan. I’ve definitely done it.
Enjoy all that flavor (and your clean kitchen!). Let me know how it went by leaving a comment and rating below!